
Estimated reading time: 9 minutes
If you want to upgrade your sourdough starter to freshly milled one, you're in the right place!
I’m walking you through exactly how I make a sourdough starter from scratch using fresh milled flour. I’ll explain what I do, why I do it, and what to expect along the way.
If you have a grain mill at home and like baking fresh milled breads (and all the other delicious things), this is for you. And even if you mainly bake with all-purpose flour, you can still make a fresh milled starter and use it in your regular recipes.
Although I do think fresh milled flour generally makes bread better - nutritionally and taste-wise.
I’ve done this a few times now, so I’ll be honest with you right away:
I don’t keep a fresh milled starter going all the time.
Fresh milled starters are easier to start than all-purpose flour starters, but for me they’re more high maintenance. They ferment quicker, feel stronger, but they’re also more volatile and less predictable.
I usually keep my starter in the fridge and bake two or three times a week. For everyday baking, I actually prefer my all-purpose flour starter because it’s slower and more dependable. It’s easier to plan around, and I don’t like planning my whole life around feeding a starter.
Summarize & Adapt The Instructions On:
That said, I do notice that anything baked with fresh milled starter tastes just a tiny bit better. So there are definitely reasons to make one.
We’ll go step by step, and I’ll explain the logic behind everything. I don’t love instructions that just say “Day 1 do this, Day 2 do that” without explaining why, because your flour is different than mine, your kitchen is different, and your starter will behave differently.
So yes, this is written from Day 1 to Day 14, but there are lots of notes along the way for what to do if things don’t look exactly like mine.
What You Need to Make a Fresh Milled Sourdough Starter
What you need to make a sourdough starter from fresh milled flour
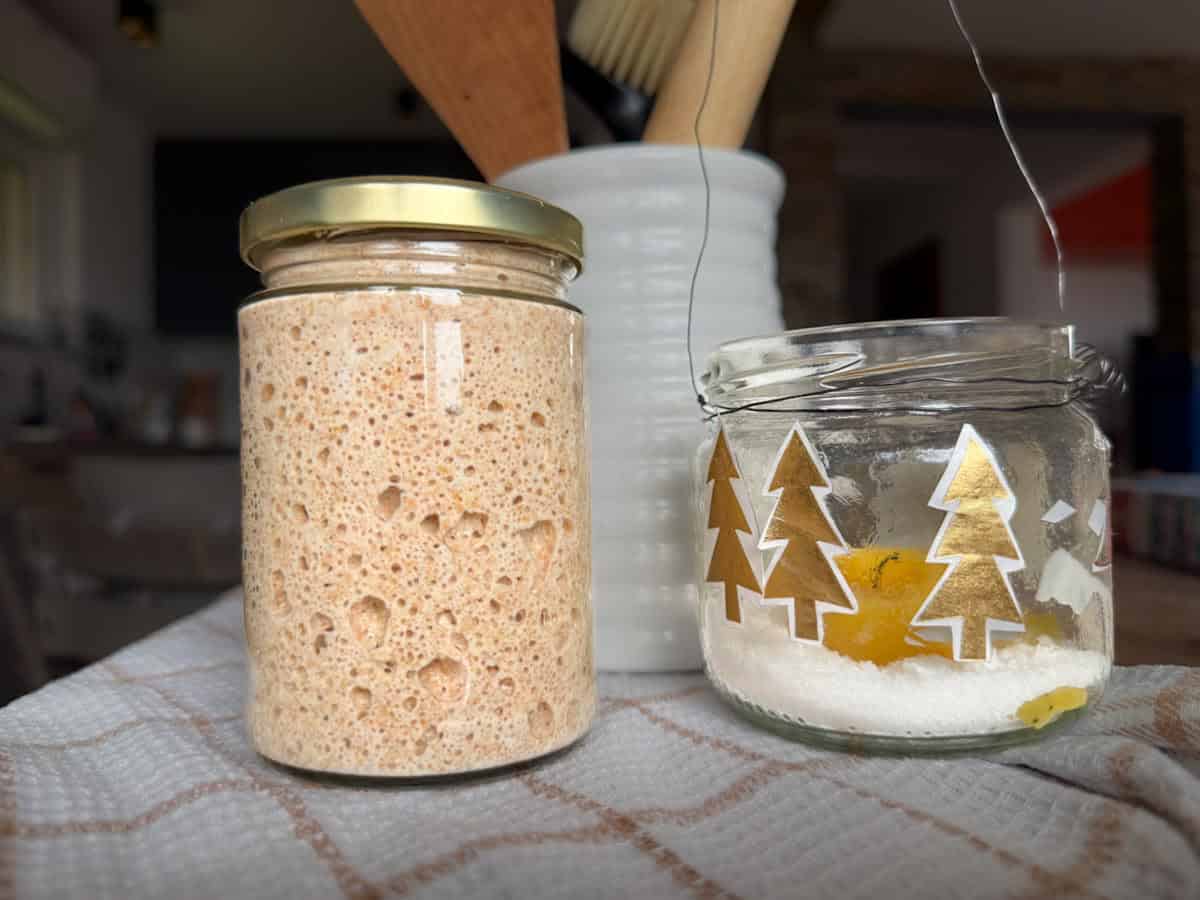
- 1 glass jar (about 400 ml, wide mouth helps to make feeding easier)
- Fresh milled wheat flour (hard or soft, red or white)
- Water - I feed my established starters with normal tap water. If your water smells strongly of chlorine, use filtered, bottled, or boiled and cooled water for establishing your starter.
- Spoon or fork (I like long-handled spoons)
- Lid placed loosely on top (not sealed) - I just use the lid that comes with the jar and twist it on lightly. It doesn’t need to be airtight, but it does need to be covered so it doesn’t dry out or attract fruit flies.
That’s it.
Temperature matters too. Ideal room temperature is roughly 21–24°C (70–75°F). Cooler kitchens will slow things down.
Choosing Your Wheat Berries
You can make a starter with:
- Hard white
- Soft white
- Hard red
- Soft red
All of them work. The difference is in speed and strength.
Hard wheat (white or red) usually ferments faster and becomes strong more quickly. Soft wheat can take longer and often rises more gently, especially in the beginning.
Choose one wheat and stick with it for the whole process. Consistency matters more than the type.
I usually use hard white wheat because it gives stronger structure and bigger bubbles, which is just more motivating when you’re starting out.
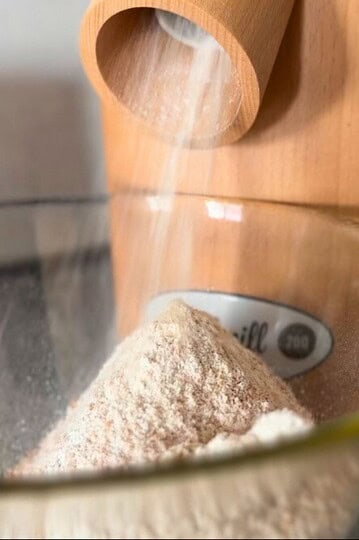
How fine to mill the flour for a sourdough starter?
I mill mine finely. Fresh milled flour is very alive and full of enzymes, and those enzymes activate as soon as flour meets water, but activation is easier if the flour is finely ground.
Important Note About Measurements
All measurements here are approximate.
Every flour is different, like kitchen is different. The amounts I list are very small, so don’t obsess over exact grams, but try to aim close.
Important note: go by consistency more than numbers. I’ll always choose consistency over precision!
Week One: The Starter Comes Alive
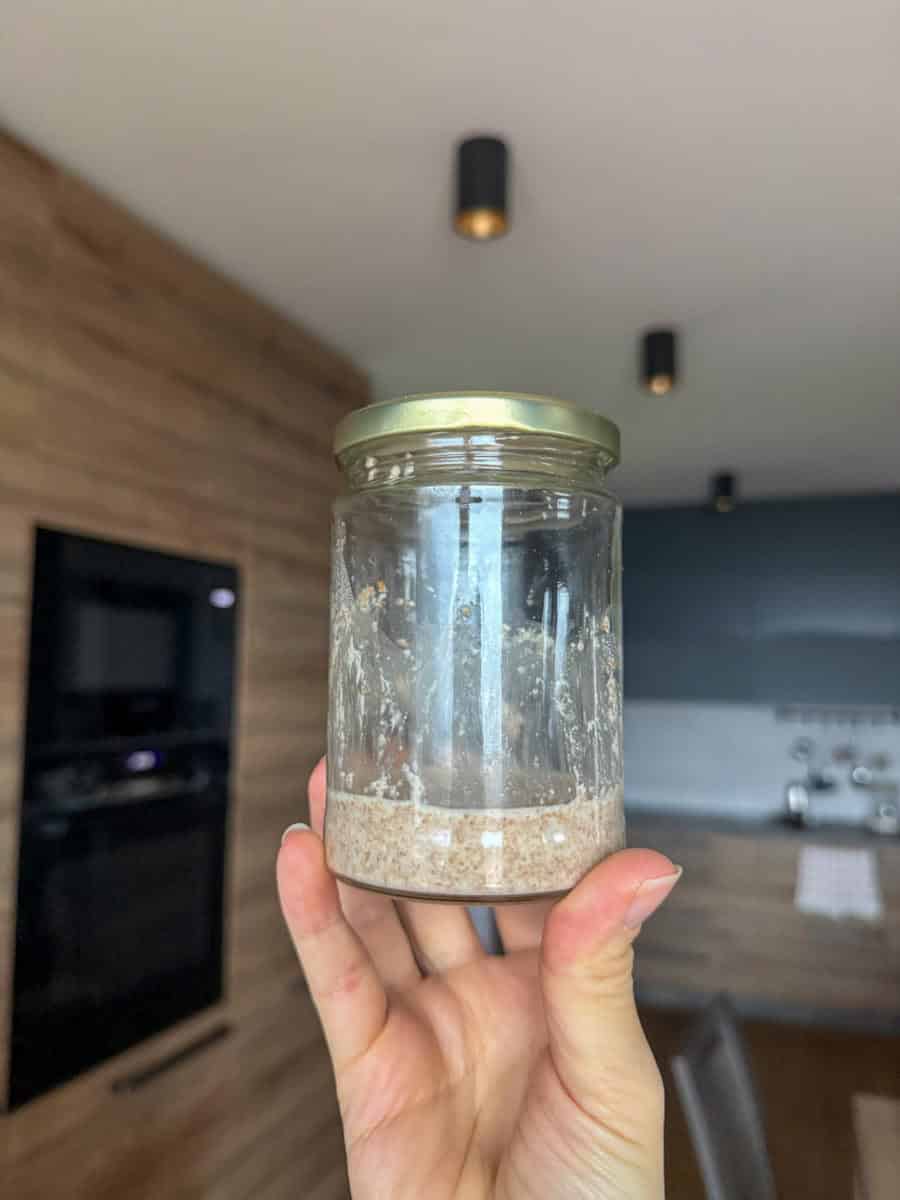
We start small because I hate wasting flour.
Day 1
Mix:
- 10 g fresh milled wheat flour
- 10 g water
Stir well, cover loosely, and leave at room temperature.
We start with slightly more water because water supports enzyme activity first, which then creates food for yeast and bacteria. This gives your starter a head start.
Day 2
Not much will happen yet.
Add:
- 10 g flour
- 10 g water
Stir and cover.
Sharp, cheesy, or funky smells are common early on. Microorganisms are balancing themselves out, and sometimes that doesn’t smell great.
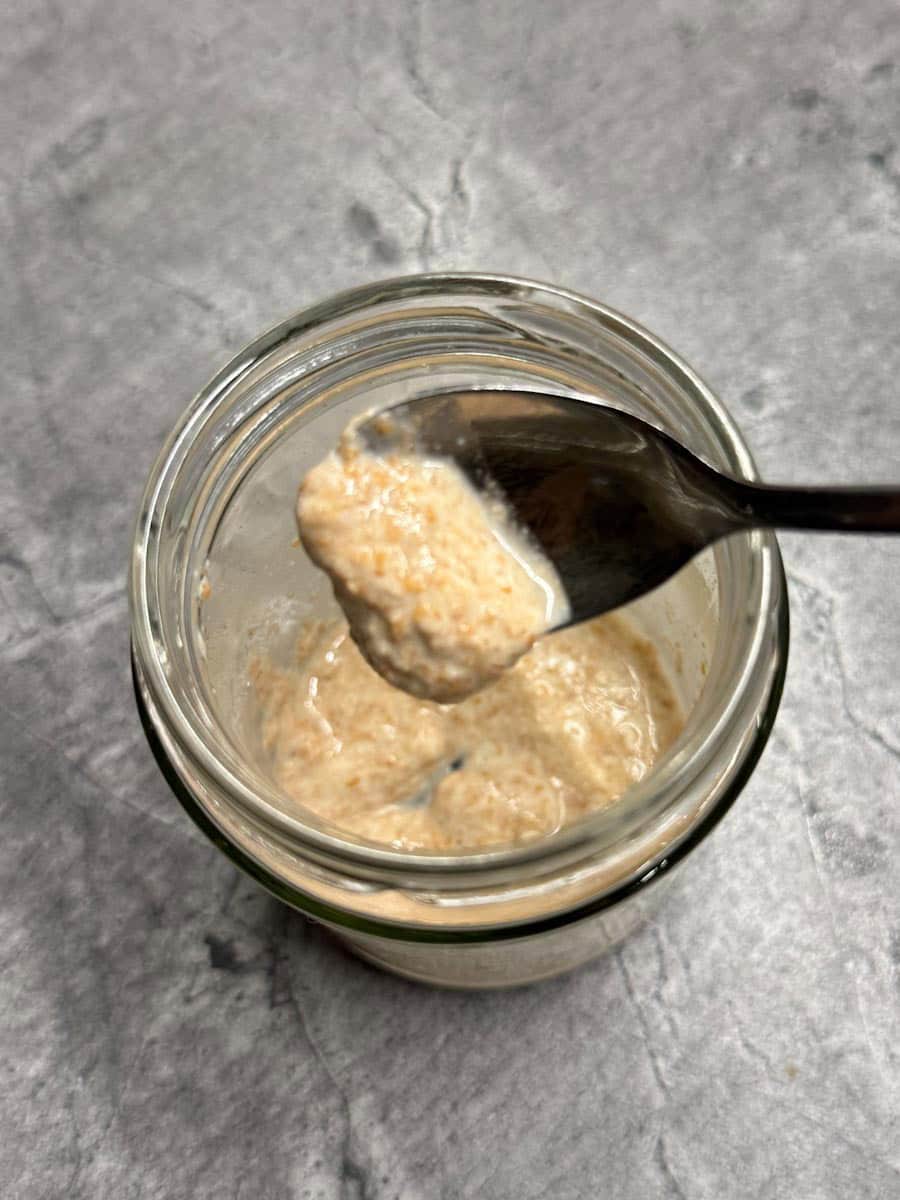
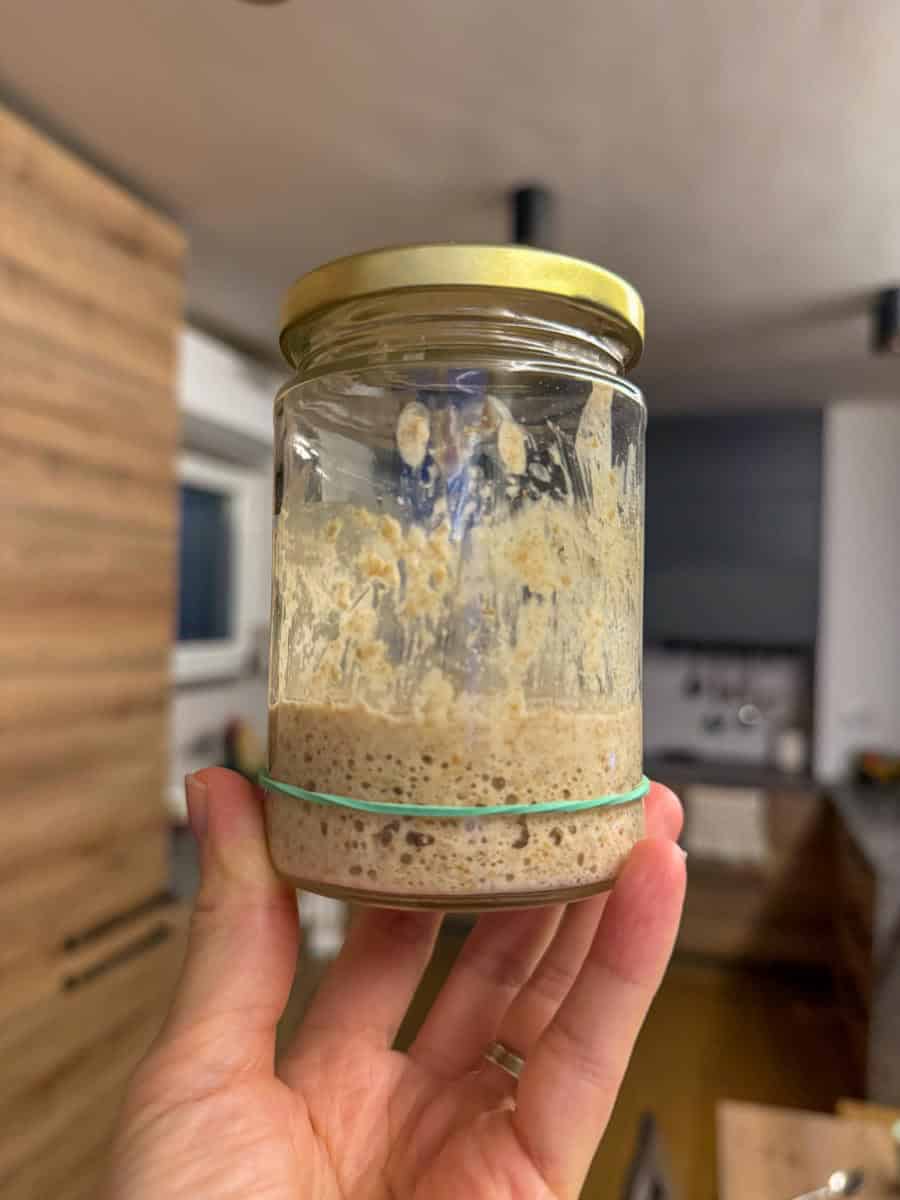
On day 2, not much was going on, but there were tiiiny tiny bubbles present in the evening.
Day 3
You may see small bubbles or a looser texture.
Add:
- 10 g flour
- 10 g water
Fresh milled starters often show early activity and then seem to stall. So don’t panic if you see bubbles and then nothing for a few days.
That’s normal.
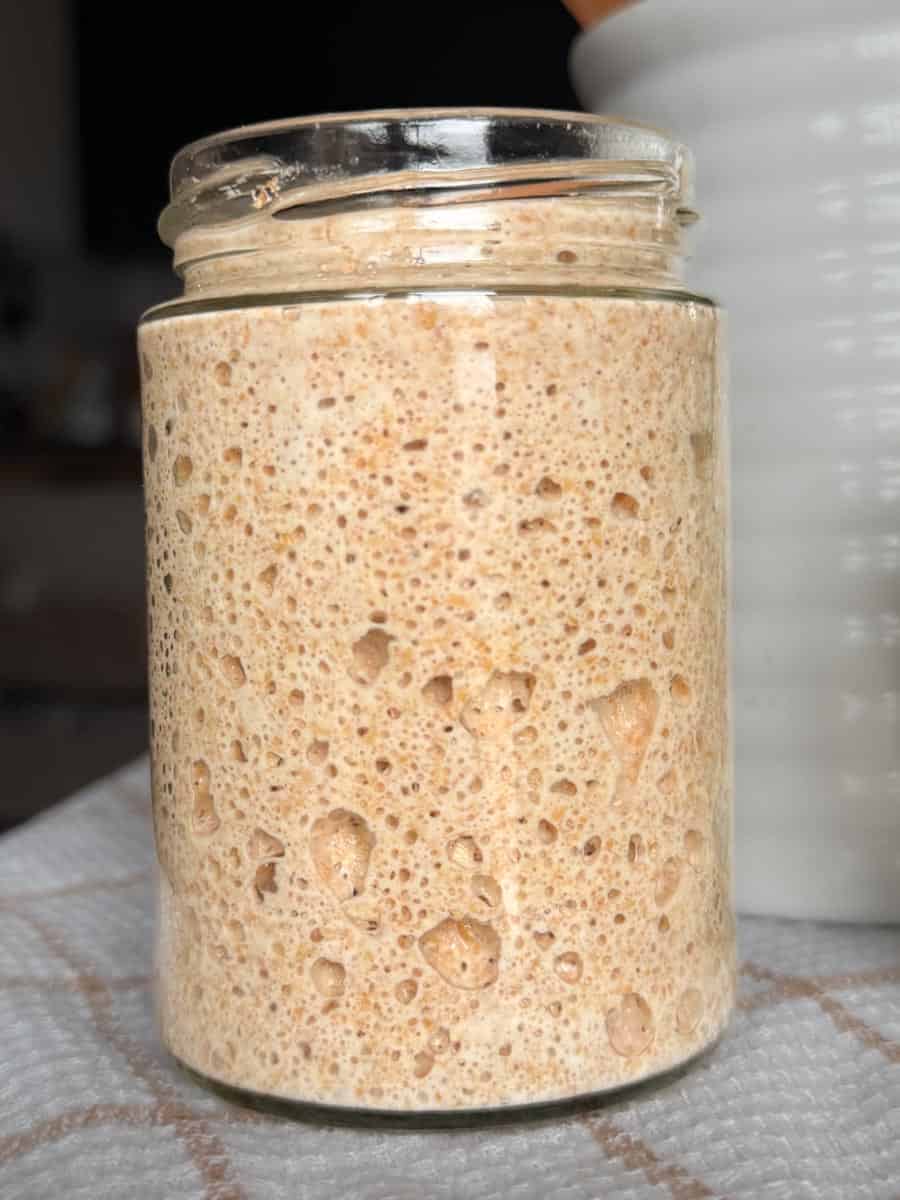
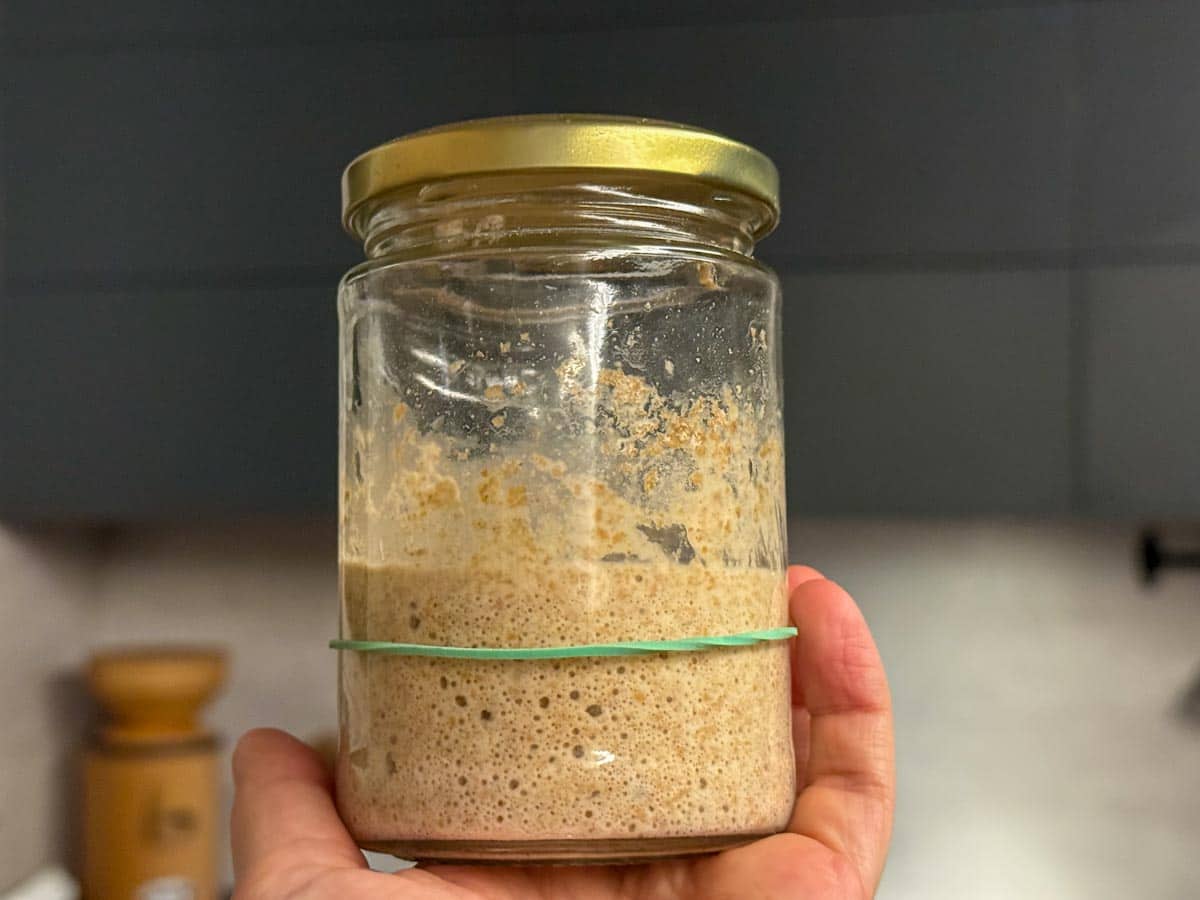
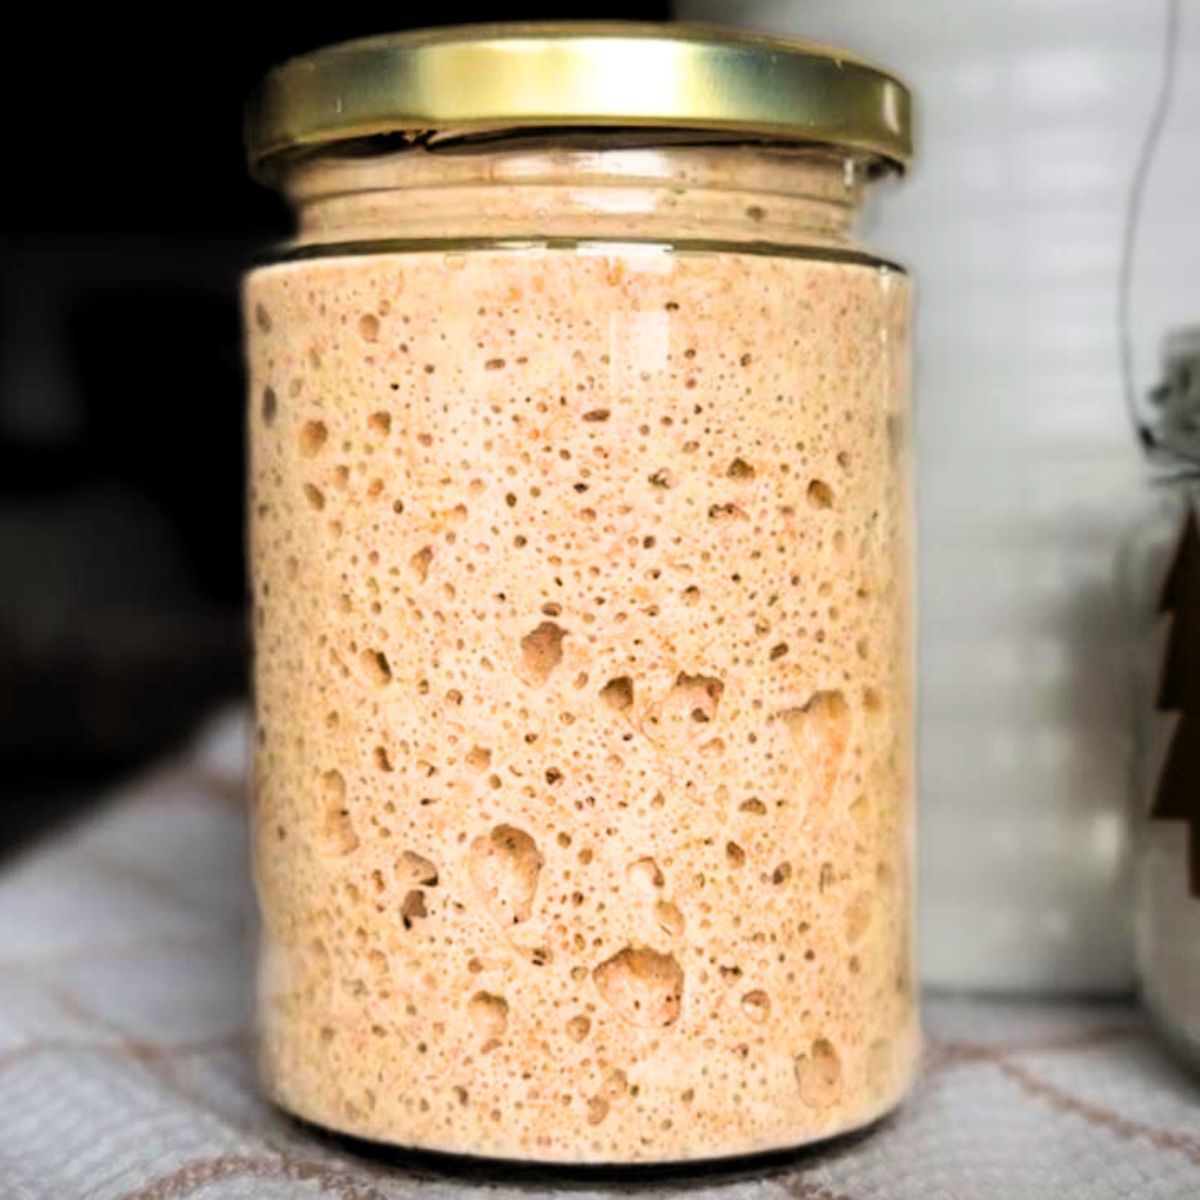
This time around, on day 3, sourdough starter almost doubled on day 3 already:
Day 4
If you’re seeing no activity at all, keep feeding 10 g flour + 10 g water for up to three extra days before moving on.
If you do see activity:
Discard all but 10 g, then feed:
- 10 g flour
- 10 g water
A mild sour or alcoholic smell is normal.
At this point we start discarding because we want the good cultures to take over.
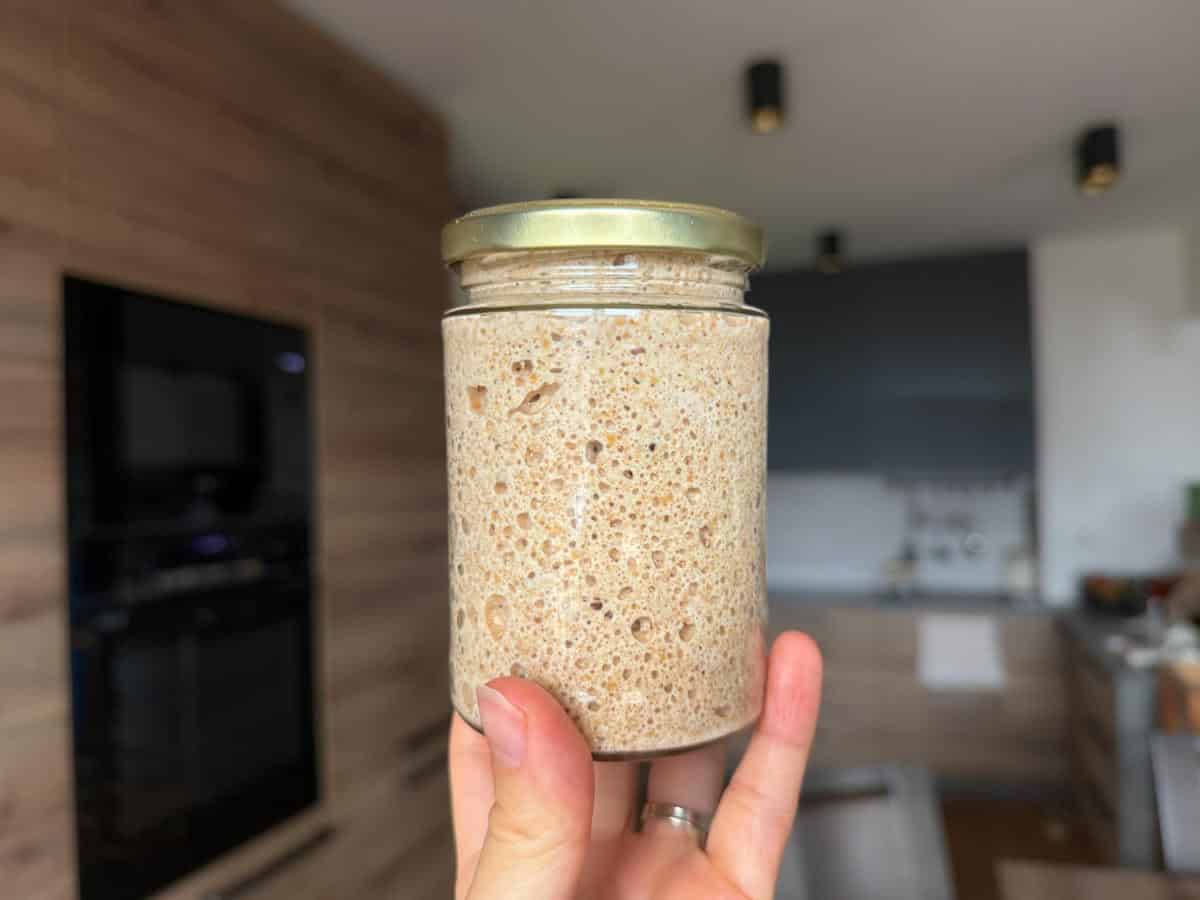
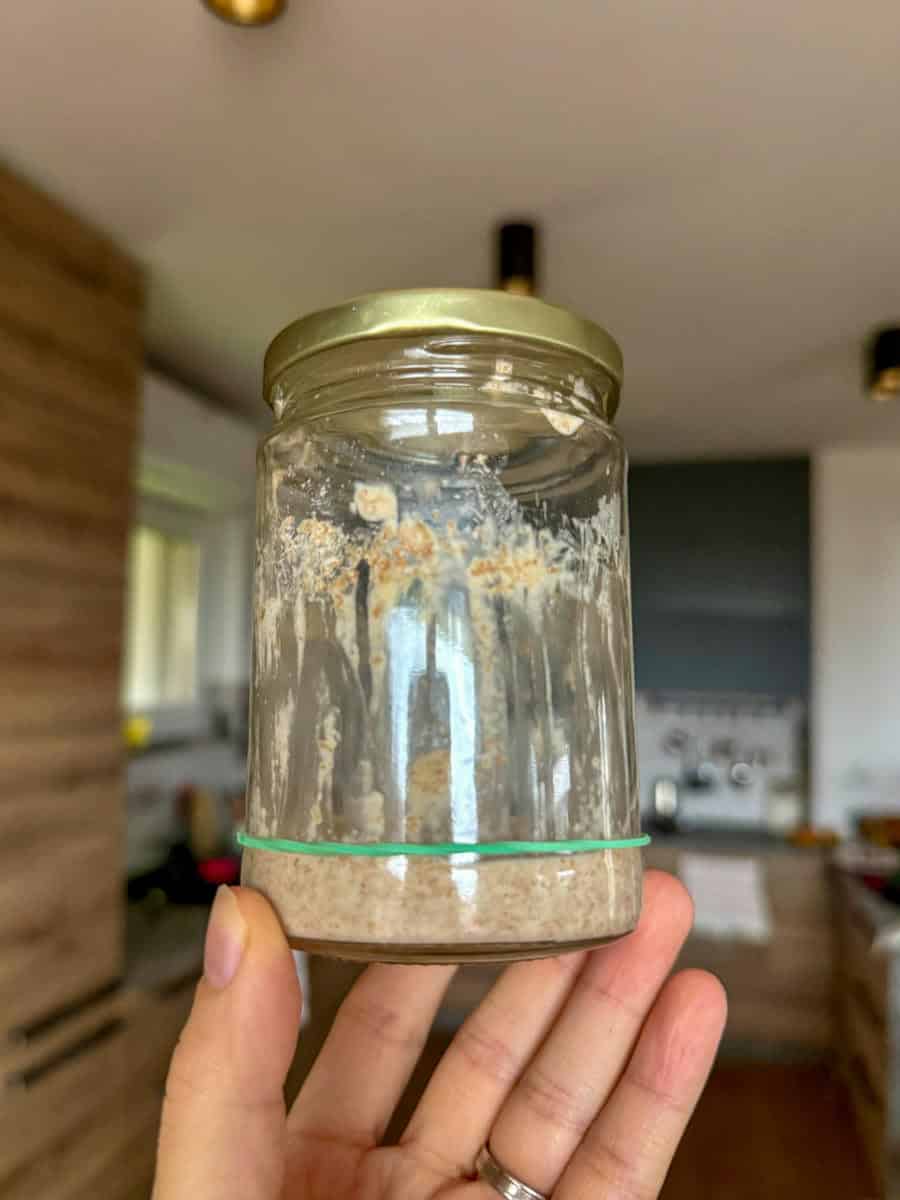
On day 4, the starter doubled nicely, and had some bigger bubbles. But the smell was still a bit off:
Day 5
Your starter may start rising after feeds.
Mark the jar with a hair tie so you can track growth.
Discard all but 10 g, then feed:
- 20 g flour
- 20 g water
Why more food? As the starter becomes more active and acidic, higher feed ratios help balance it and build yeast strength.
I didn't include any photos for days 5 and 6, since the situation was very similar to day 4 visually, but the smell improved!
Day 6
You should see bubbles now. Some starters may already be doubling.
Start feeding twice a day.
Each time:
- Keep 10 g starter
- Feed 20 g flour + 20 g water
Your starter should begin rising and falling.
When it falls, that means it’s hungry.
Day 7
Repeat morning and evening:
- 10 g starter
- 20 g flour
- 20 g water
Doubling within 4–6 hours is a good sign, even if soft wheat rises more gently.
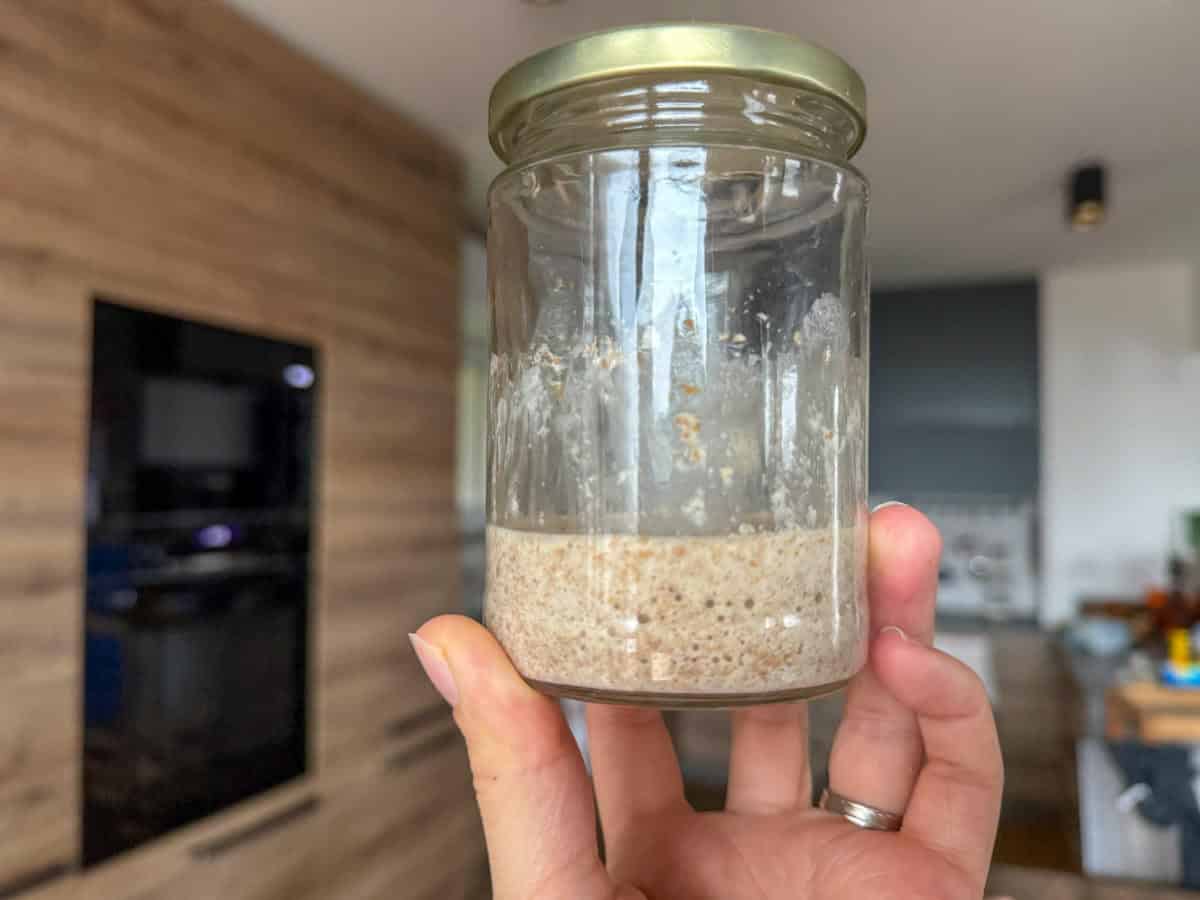
On day 7, starter smelled great and more than doubled in 12 hours, so I decided to discard some for the last time, feed it, and bake in the morning. I baked a beautiful loaf!
Week Two: The Starter Gets Strong
Days 8–9
Feed twice daily.
Each time:
- Keep 10 g starter
- Feed 30 g flour + 30 g water
You should see steady rise, peak, and fall.
Days 10–13
To reduce waste:
- Keep 10 g starter
- Feed 30 g flour + 30 g water
Morning and evening.
Soft wheat starters may not dome much, but consistent bubbling and predictable timing matter more than height.
Day 14: Ready to Bake
Your starter should now be stable and active.
You can keep feeding it this way or make it slightly thicker if you prefer. With fresh milled wheat, thicker starters are often easier to maintain.
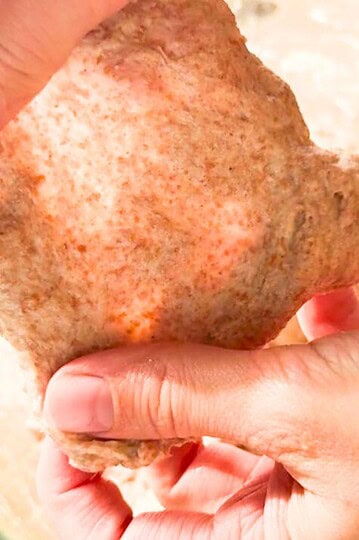
You can bake your first loaf.
How to Make a Sourdough Starter With Fresh Milled Flour
Ingredients
- Fresh milled wheat flour hard or soft, red or white
- Water filtered/bottled/boiled and cooled if your tap water smells strongly of chlorine
Equipment
- 1 glass jar about 400 ml, wide mouth
- 1 spoon long-handled helps
- 1 lid
Instructions
- Day 1: Mix 10 g fresh milled wheat flour + 10 g water. Stir well, cover loosely, and leave at room temperature.
- Day 2: Add 10 g flour + 10 g water. Stir and cover.
- Day 3: Add 10 g flour + 10 g water. Stir and cover. (Early activity is common, and then it may stall.)
- Day 4:If you see activity: discard all but 10 g starter, then feed 10 g flour + 10 g water.If you see no activity: keep feeding 10 g flour + 10 g water daily for up to 3 extra days before moving on.
- Day 5: Discard all but 10 g starter. Feed 20 g flour + 20 g water.
- Day 6: Start feeding twice a day. Each time: keep 10 g starter, then feed 20 g flour + 20 g water.
- Day 7: Repeat twice daily: keep 10 g starter, then feed 20 g flour + 20 g water. (Doubling within 4 to 6 hours is a good sign.)
- Days 8 to 9: Feed twice daily. Each time: keep 10 g starter, feed 30 g flour + 30 g water.
- Days 10 to 13: Feed twice daily. Each time: keep 10 g starter, feed 30 g flour + 30 g water.
- Day 14: Your starter should be stable and active. Keep feeding the same way, or make it slightly thicker if you prefer. Bake your first loaf when it doubles consistently and you can predict its timing.
Nutrition
Video
Notes
- Temperature matters: Ideal room temp is about 21–24°C (70–75°F). Cooler kitchens slow everything down.
- Don’t obsess over exact grams: These are small amounts. I go by consistency more than numbers.
- Fresh milled starters can look “alive” early, then stall: That’s normal.
- Don’t bake too early: Even if it gets active fast, giving it extra days usually helps a lot.
- Don’t use discard while establishing the starter: Early funky smells mean unwanted microbes are still balancing out.
- Ready = predictable: When it doubles consistently and you can predict its behavior, that’s when it’s ready.
Private Notes
Tried this recipe?
Please leave a rating!A Few Important Things I Want You to Know
- Fresh milled flour is extremely nutritious and active. Sometimes you’ll see bubbles on Day 2. Sometimes everything looks dead for days. Both are normal!
- Don’t try to bake too early, even if you see activity fast, give it time. A few extra days can make a big difference.
- Don’t use discard while establishing your starter. Early smells mean unwanted microbes are still present. Once your starter is mature, discard is fine.
- Smells will vary. Fresh milled starters smell stronger than all-purpose starters. Healthy starters still smell sour. They don’t smell amazing to me, and that’s normal.
- When your starter doubles consistently and you can predict its behavior, that’s when it’s ready.
Again: fresh milled starters are easy to make, but they do require some patience. Let the cultures balance themselves out. Don’t rush it!
And remember: your flour is different, your kitchen is different, and that’s okay. Learn the process, trust what you see, and adjust when needed.
Please let me know if you have any questions in the comments bellow! I'd love to help out, seriously. Don't be shy 🙂
Need Help Tweaking The Instructions?

Shana says
on day 7 I stalled, no doubling in 4-6 hours. Do i still feed according to the recipe? Thank you in advance.
Tina says
Hm...if the starter seems less active, I'd start feeding it only once/day for a few days, and resume feeding it 2x/day wen it becomes active again. As for the quantities of flour and water, I'd still follow the recipe (meaning discarding quite a bit + feeding quite a bit 🙂 ) It's not unusual for starter to do this btw! If everything is ok, the activity will resume in a few days. Let me know if you have any more questions!
Melissa says
Thanks for sharing! I have a sourdough tarter I started myself a few years ago ago..but it’s with unbleached white flour from the store. I just started using fresh milled hard red and soft white wheat berries…could I just discard like normal and add the good flour to the sourdough I already have? Thanks!
Tina says
Hi,
yes, you can absolutely do that! Honestly, I think that's the smartest way to do it. I know a lot of people want to make theirs from scratch, but this is actually what I do if I need a fresh milled starter quickly. If you want it to be very "freshly milled", take only about 1 tsp of your white starter (a scrap of it), and feed it with little freshly milled flour and water. Wait for it to come to its peak, then feed it again more normally...and your starter will be 99% freshly milled, and with time 100%, if you maintain it with freshly milled flour only.
Stacy says
this will be my first go at making sourdough and doing a fresh milled starter. I have a few questions after reading through your steps, it says on day 7 you baked your first loaf. but then day 14 your first loaf, i am confused. can you clarify?
how do I know if the starter has stalled?
on day 14 do I keep a portion to start referring?
if so, do I start on day 2 then?
Tina says
Hi Stacy!
I answered in an email directly and I'm currently updating this post to reflect the changes, Thank you again so much for pointing them out!