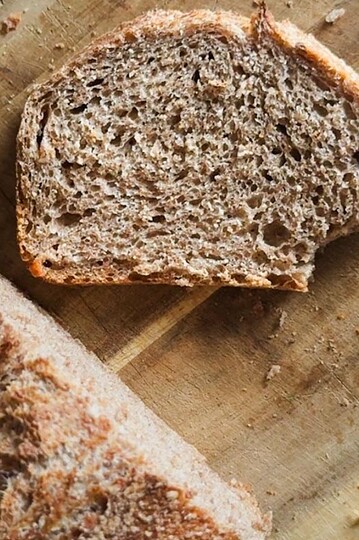
If you’ve been wanting to bake nourishing bread at home, this basic fresh milled sourdough bread is a perfect place to start. It’s made with freshly milled hard white wheat, has a soft, hearty crumb, and a beautiful crust. This is the kind of bread that can easily becomes part of your weekly rhythm!
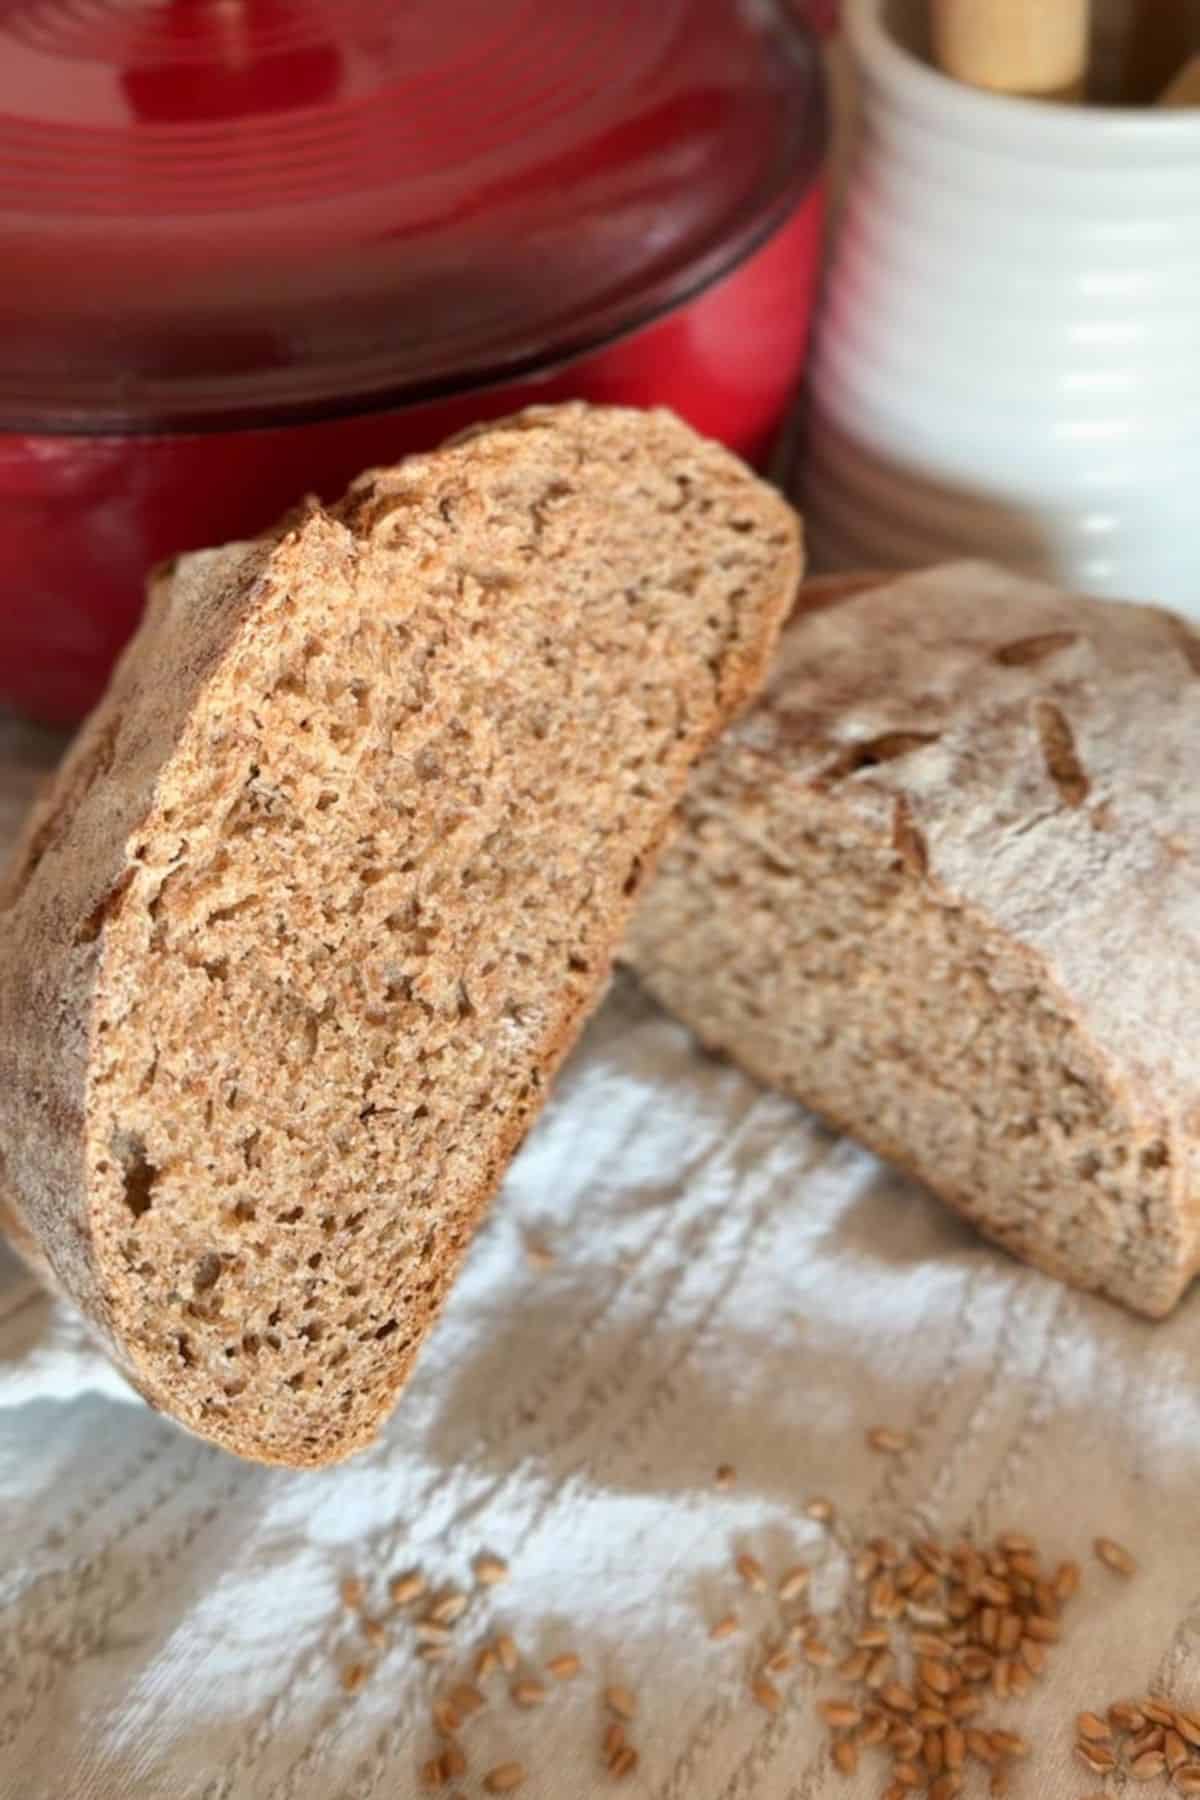
Slice it for toast, sandwiches, or just warm it with butter and honey. Once you bake it a few times, the process feels natural and not hard enough not to do it.
If you’re short on time, this same-day sourdough option is a great alternative and still uses freshly milled flour. If you don't have a Dutch oven, you can simply bake fresh milled sourdough in a loaf pan.
Summarize & Save This Recipe On:
Quick Look
- Prep time: 30 minutes
- Fermentation & rise time: 6–9 hours
- Bake time: 20–25 minutes
- Servings: 8 bagels
- Main ingredients: Fresh milled hard white wheat flour, sourdough starter, water
- Cooking method: 🡢 Boil + Bake
- Difficulty: Intermediate (time-intensive but beginner-friendly)
- Serving ideas: Toasted with cream cheese, breakfast sandwiches, or savory spreads
Jump to:
- Summarize & Save This Recipe On:
- Quick Look
- Important Ingredients
- Substitutions & Variations
- How to Make Basic Fresh Milled Sourdough Bread
- Baking Schedule
- 💭Crucial Success Tips
- Recipe FAQs
- How To Store Basic Fresh Milled Sourdough Bread
- Other Delicious Recipes
- Basic Fresh Milled Sourdough Bread Recipe
- Need Help Tweaking This Recipe?
- Other X Recipes You'll Love
Important Ingredients
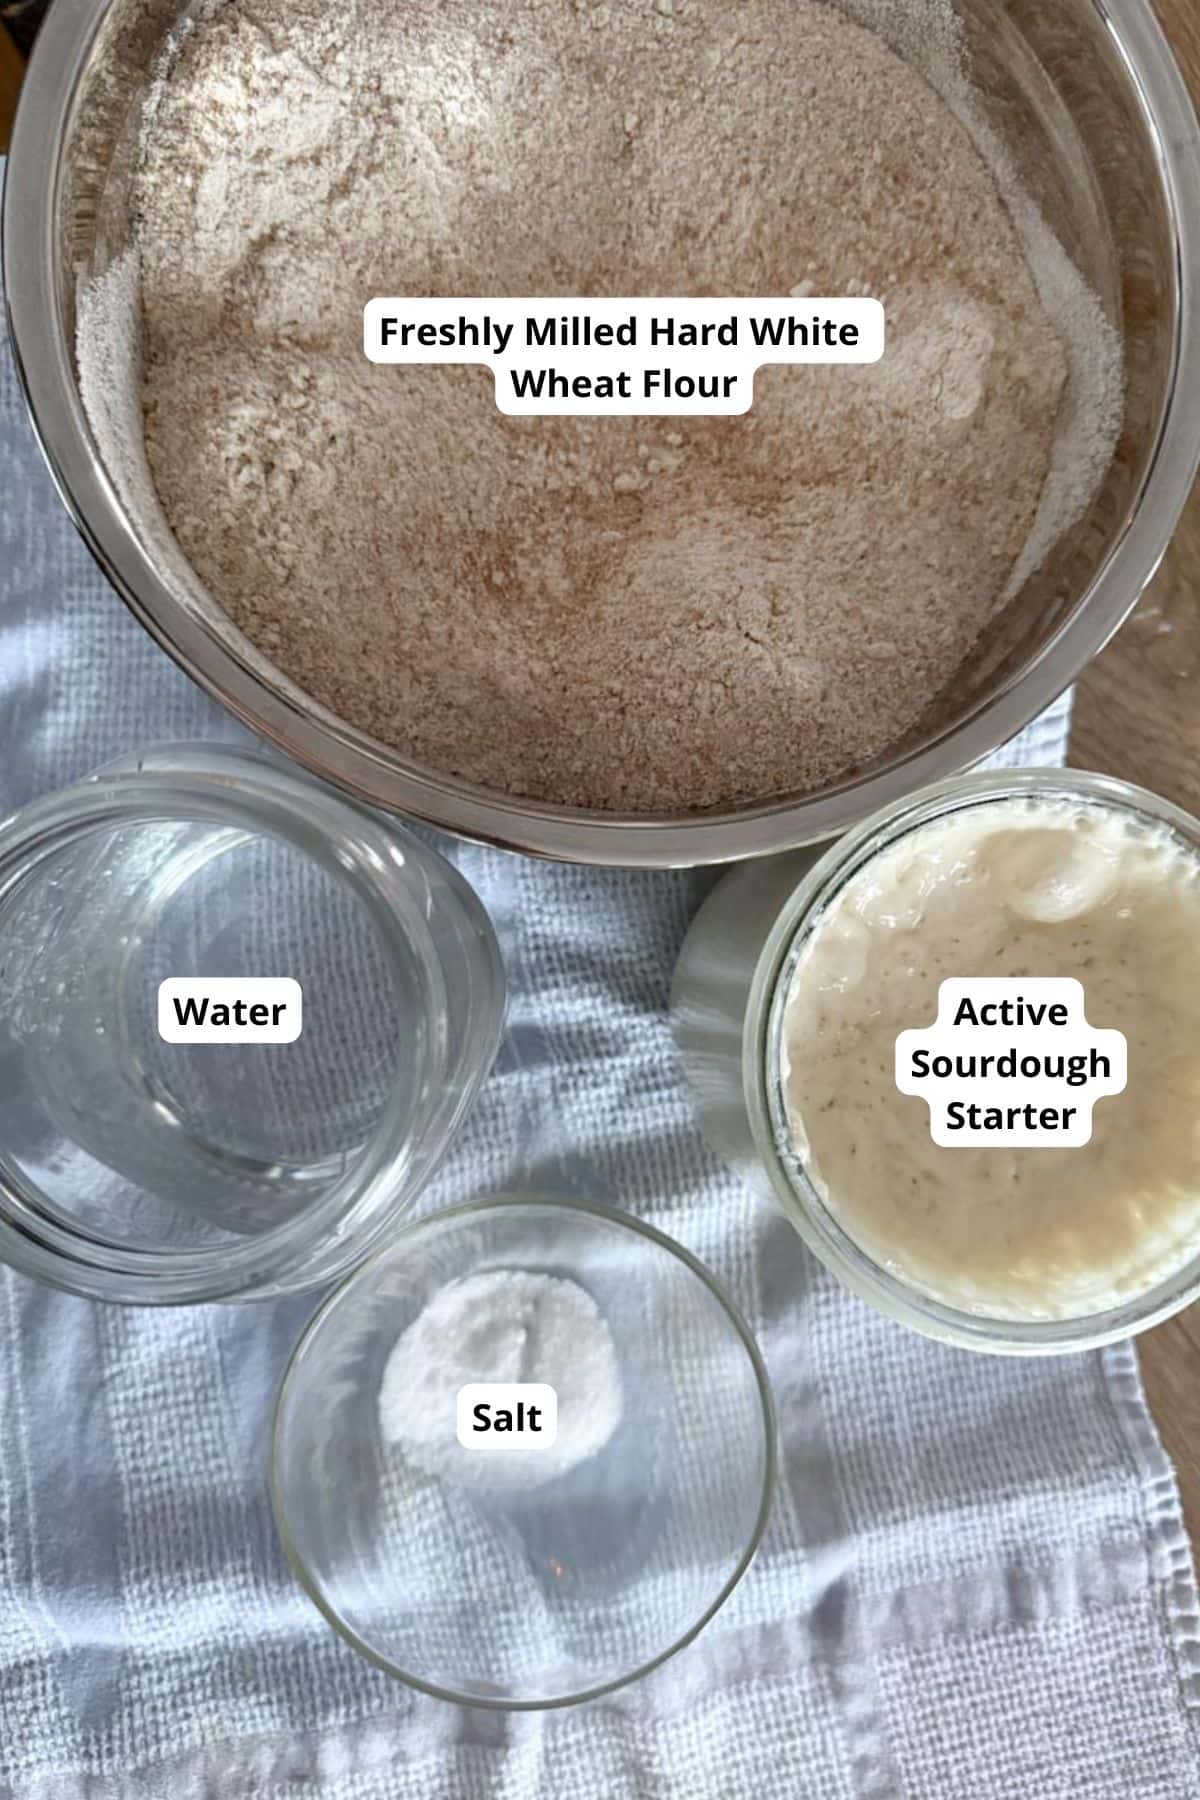
- Fresh Milled Hard White Wheat Flour gives your bread a wholesome, nutty flavor and soft texture.
- Water hydrates the flour and helps your starter activate.
- Active Sourdough Starter helps your bread rise naturally and gives it a rich, slightly sour flavor.
- Salt enhances flavor and strengthens the dough.
See recipe card for quantities.
Substitutions & Variations
- Flour options: You can replace the hard white wheat flour with hard read wheat. The wheat flavor will be more pronounced this way.
- Liquid: Water is standard, but you can use part milk or even a mix of milk and water for a slightly softer crumb.
- Fermentation timing: If you’re short on time, the room-temperature rise can be shortened slightly, or the cold fridge fermentation can go longer for more developed flavor.
How to Make Basic Fresh Milled Sourdough Bread
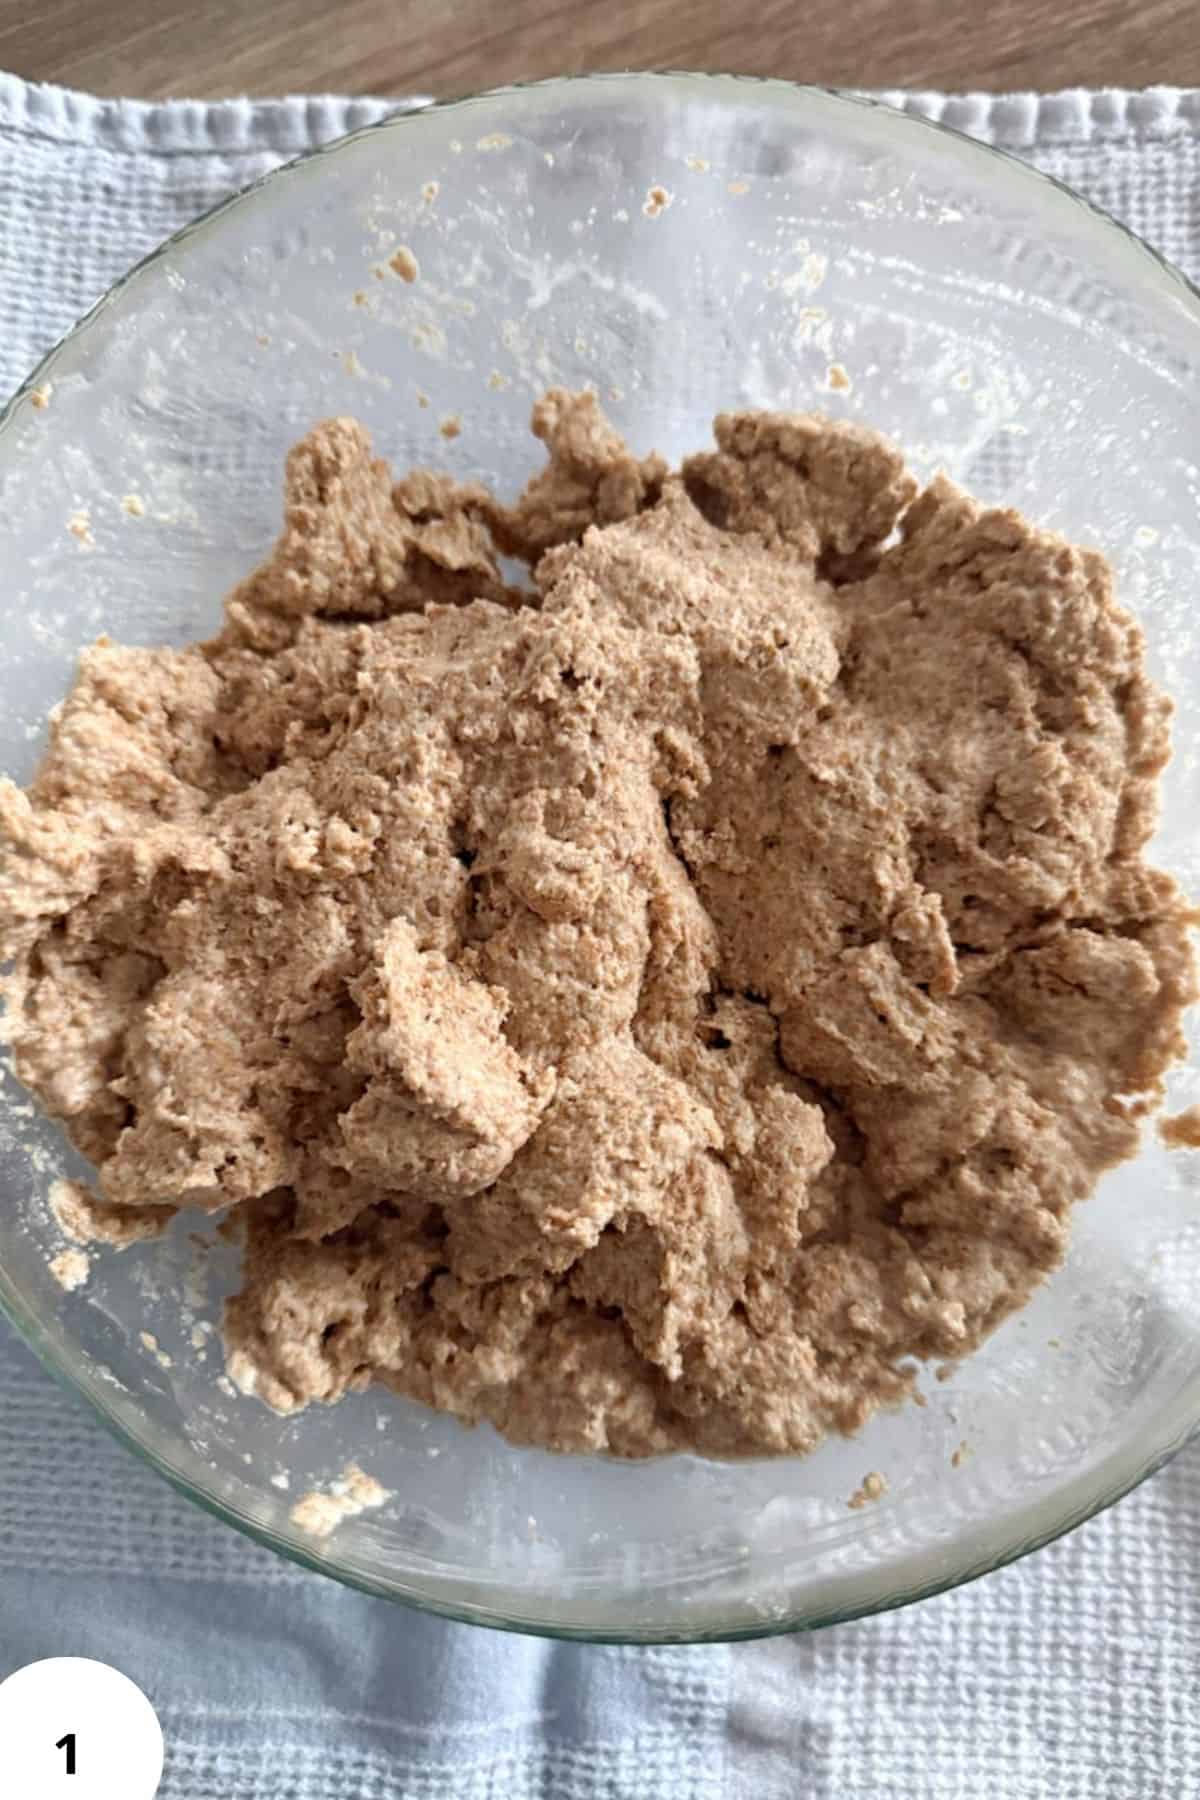
Step 1: In a large bowl, mix the flour and water until no dry spots remain (about 3 minutes). I find it easiest to “squeeze” the dough between my fingers a few times. The dough will feel fairly dry (Image 1) at this stage. Cover and let rest for 30 minutes.

Step 2: Add the sourdough starter and salt. Knead until fully incorporated into the dough (about 3 minutes) (Image 2).
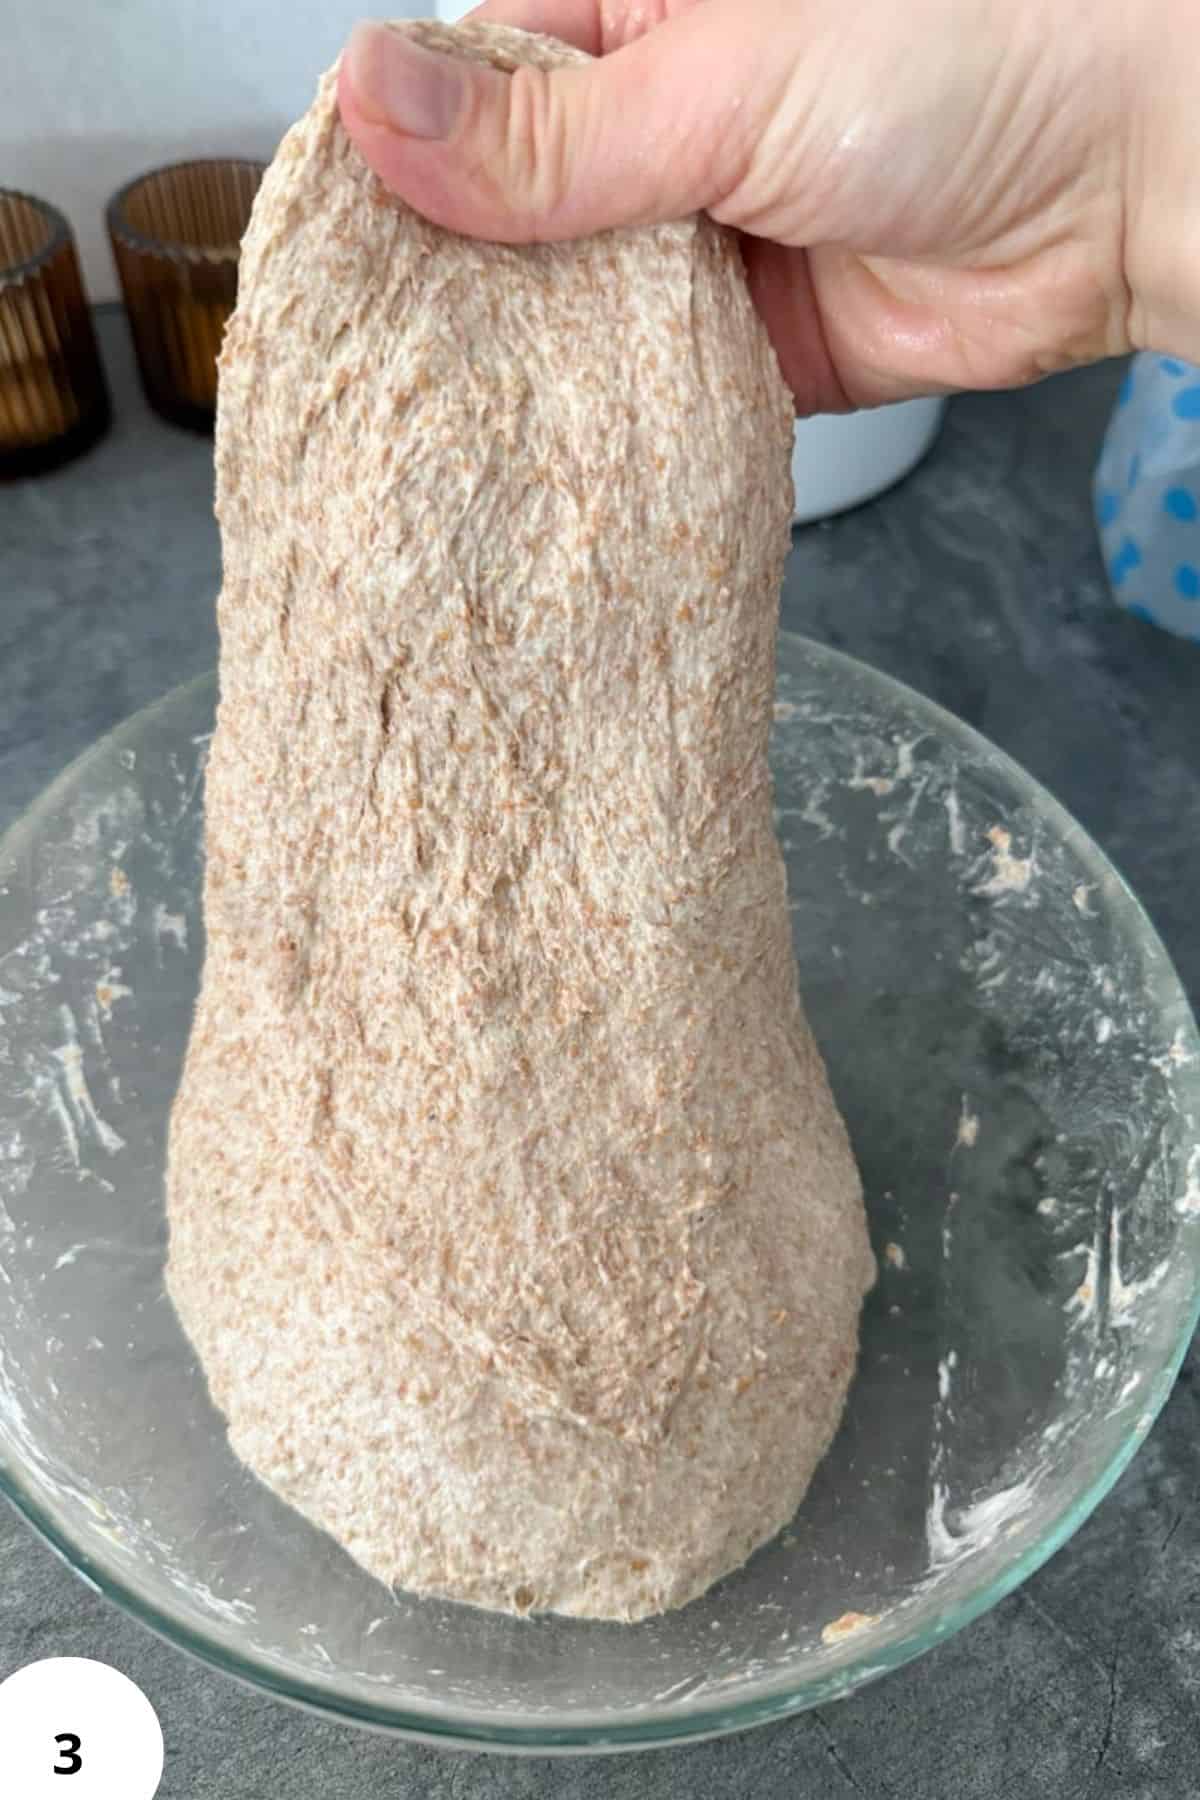
Step 3: Over the next 2 hours, perform about 3 sets of stretch and folds (Image 3), spaced roughly 30 minutes apart.

Step 4: After the final set, let the dough continue fermenting at room temperature until it looks noticeably puffed and taller (Image 4). Total room-temperature fermentation time is about 4–6 hours, depending on your kitchen and starter strength. Start counting the bulk fermentation from the moment you add the starter to the dough.
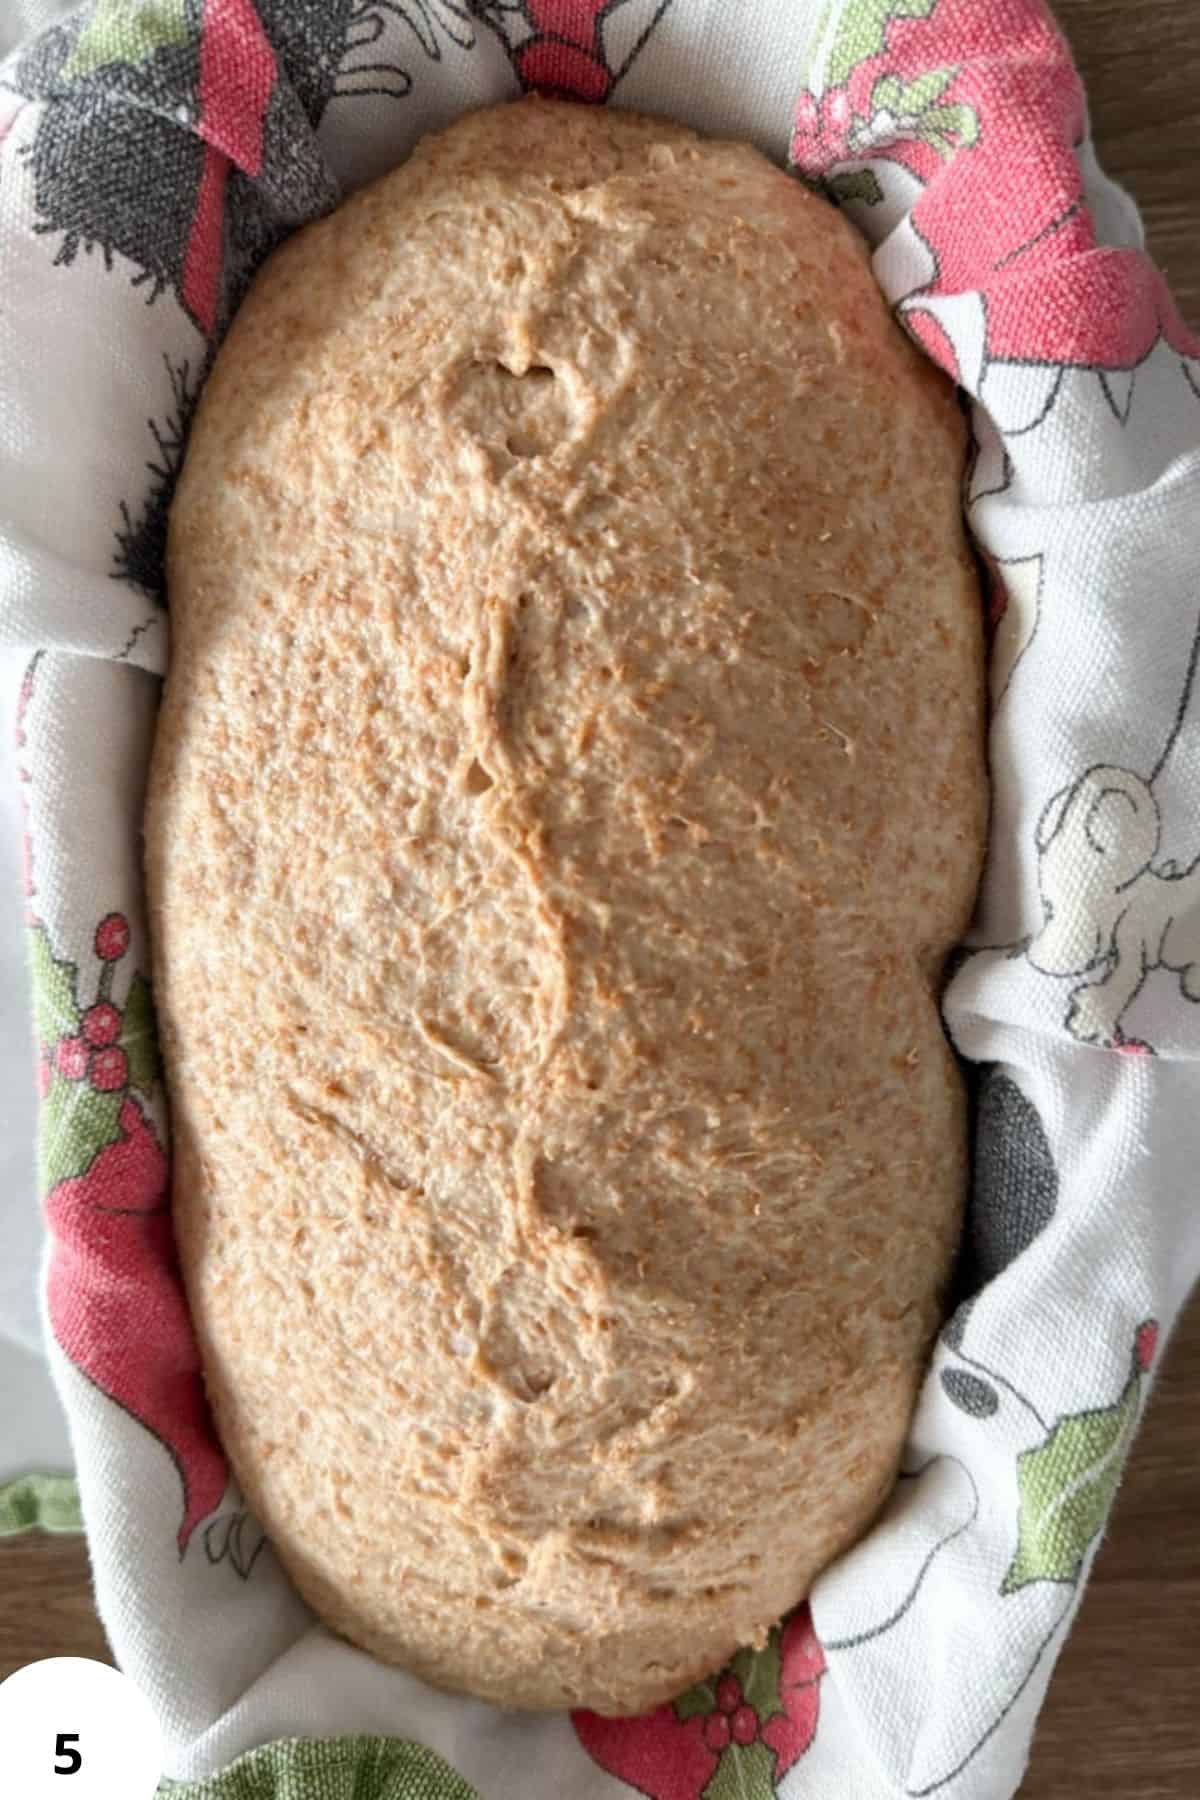
Step 5: Shape the dough into a rough rectangle (it’s okay if it’s uneven), roll it up, turn it sideways, and roll it up again. Then shape it into a boule or batard (oval or ball shape, depending on your proofing basket). Place it seam-side up in a floured proofing basket and pinch the seam to seal (Image 5).
Second rise (choose one):
- Room temperature: let rise 2–3 hours until slightly expanded.
- Refrigerator: cover and cold-ferment 8–24 hours.
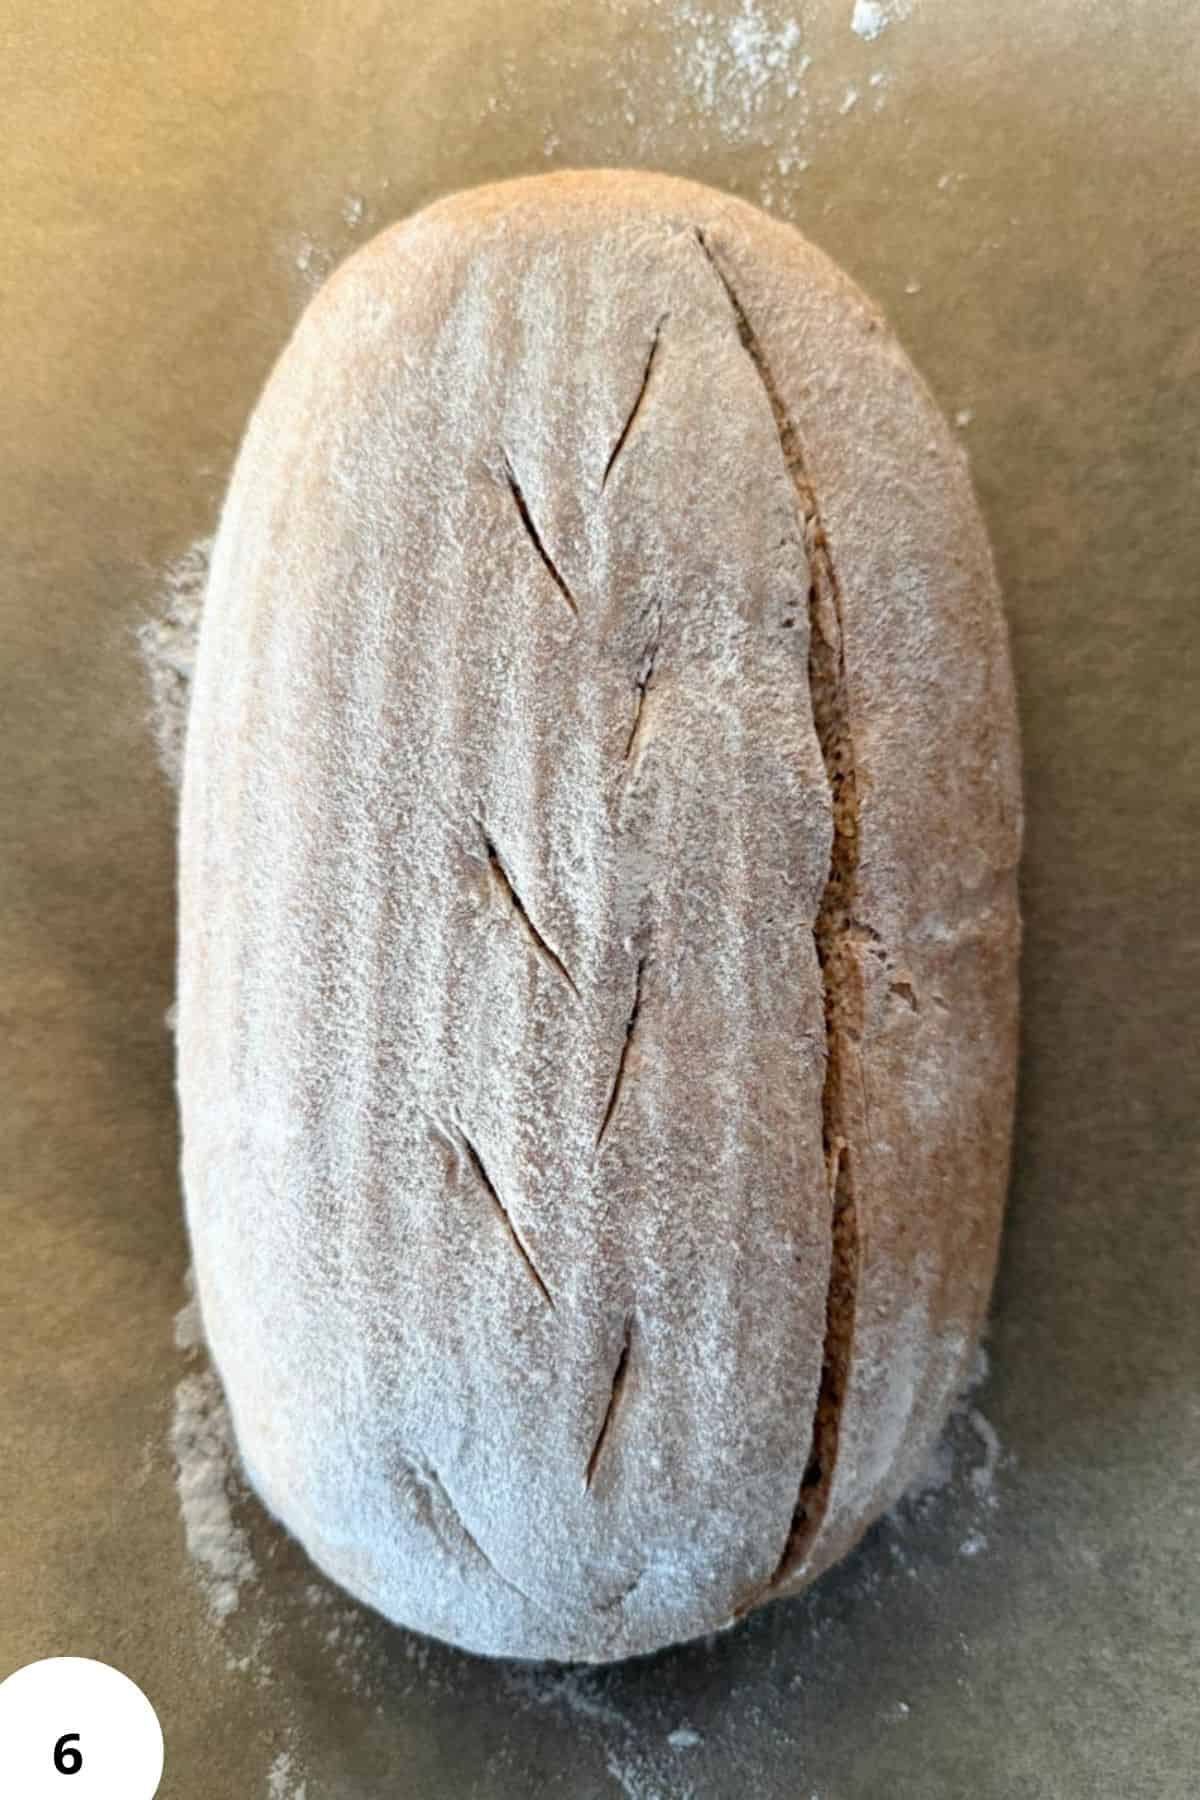
Step 6: Preheat the oven with a Dutch oven inside to 270°C (520°F).
Lower the temperature to 240°C (465°F), transfer the dough into the hot pot, cover, and bake for 25 minutes (Image 6).

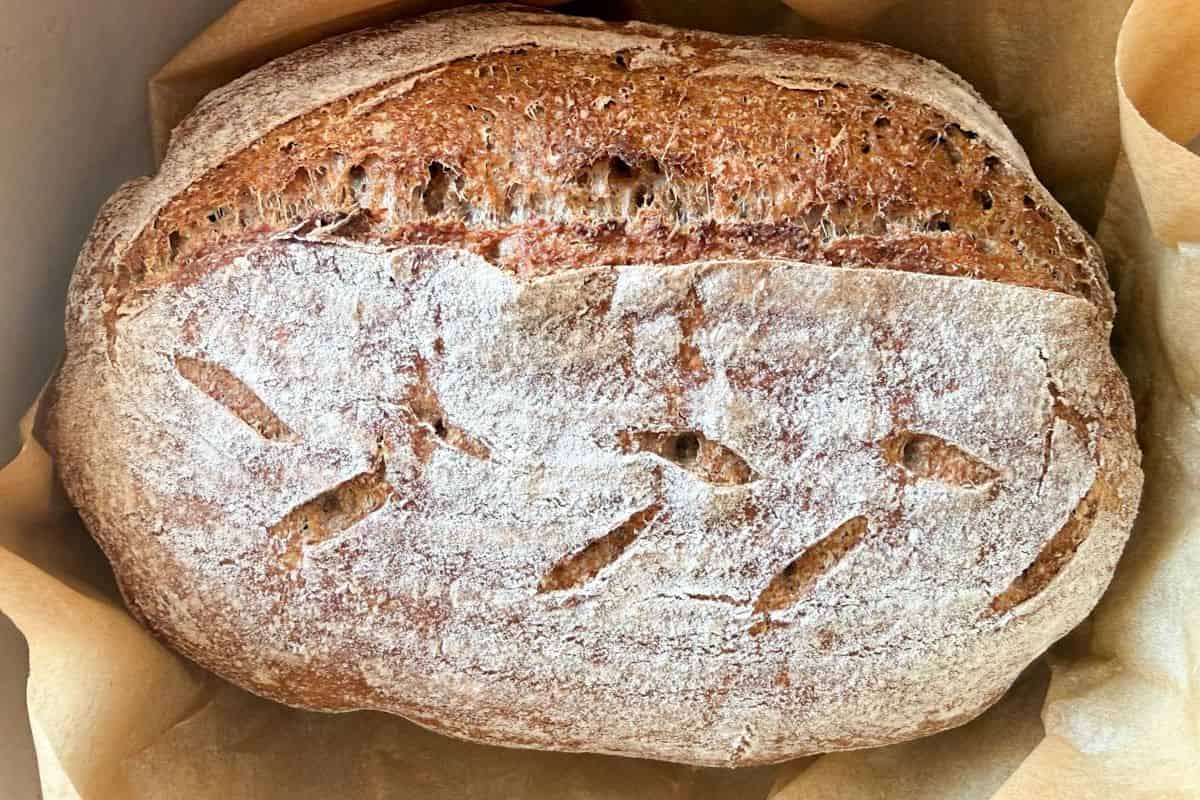
Step 7: Remove the lid, lower the temperature to 200°C (390°F), and bake uncovered for another 25 minutes (Image 7).

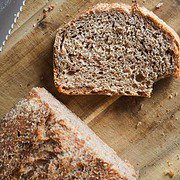
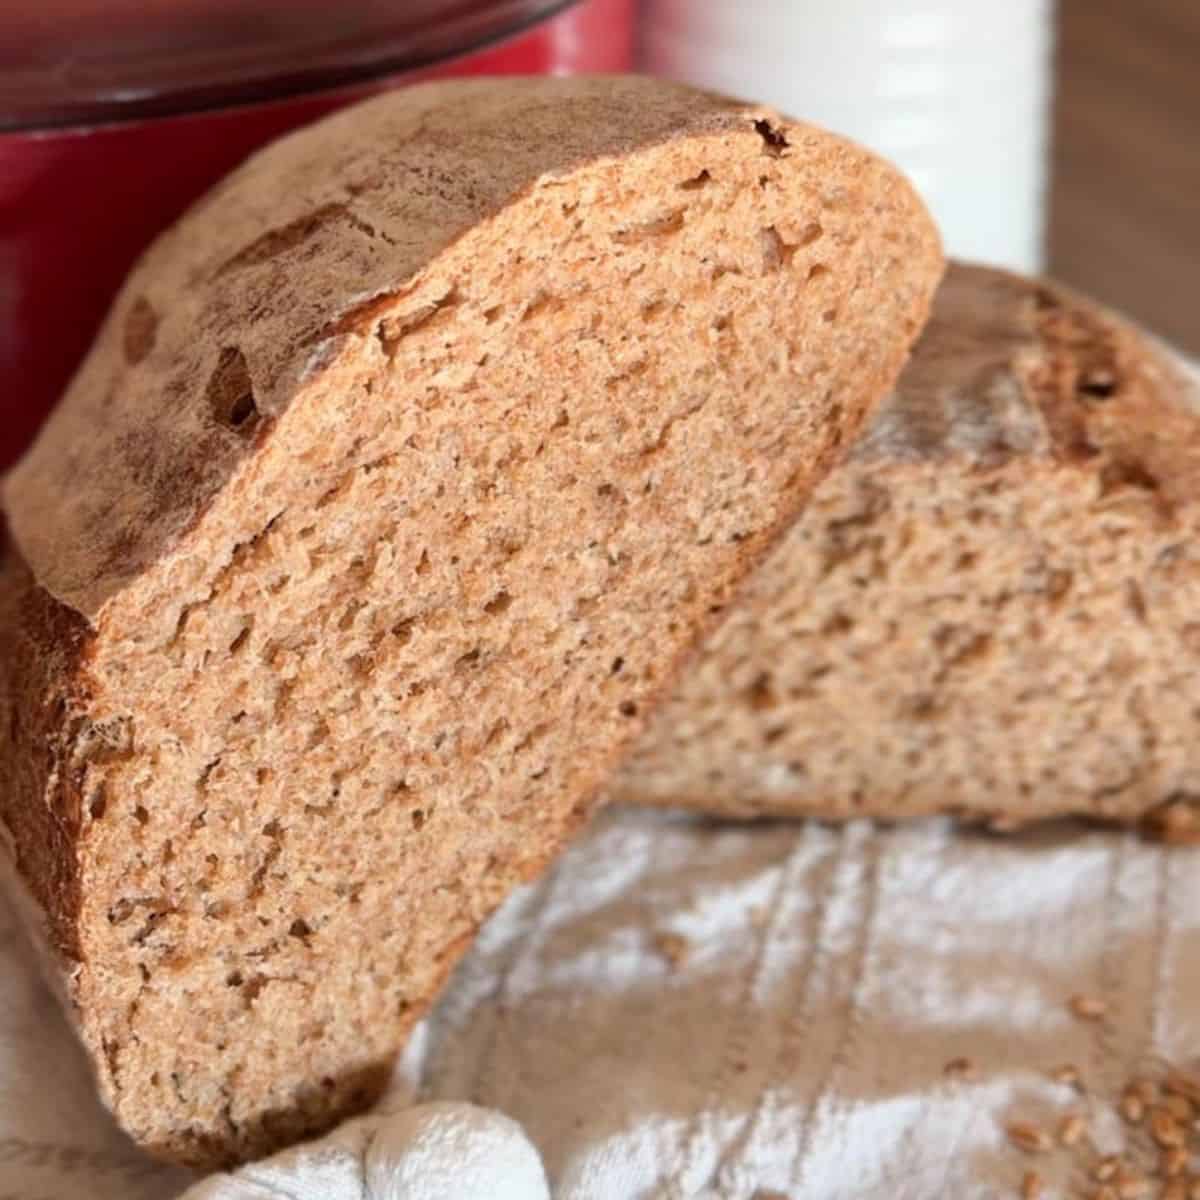
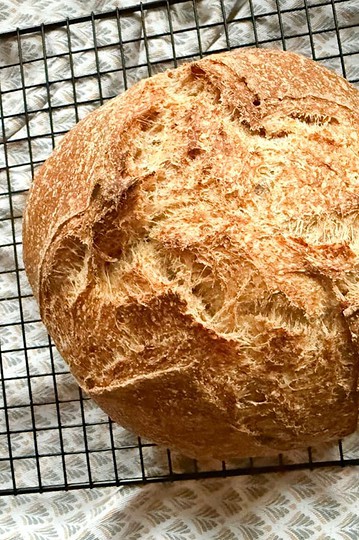
Step 8: Remove from the oven and let cool completely before slicing (Image 8).
Hint: Freshly milled dough can feel firmer and drier at first, especially before the stretch and folds. Resist the urge to add extra water too early. Give the dough time to hydrate fully during the rest and folding stages, and you’ll end up with a much smoother, more workable dough by the end of bulk fermentation.
Baking Schedule
Day 1 – Morning (8:00 AM)
Mix the fresh milled flour and water until no dry spots remain. Cover and let the dough rest for 30 minutes.
8:30 AM
Add the sourdough starter and salt. Knead until fully incorporated.
9:00 AM to 11:00 AM
Perform 3 sets of stretch and folds, spaced about 30 minutes apart.
11:00 AM to 2:00–4:00 PM
Let the dough bulk ferment at room temperature until it looks puffed and has increased in volume. Total bulk fermentation is about 4 to 6 hours from the time the starter is added.
Late Afternoon (3:00–5:00 PM)
Shape the dough and place it seam-side up in a floured proofing basket. Cover and refrigerate for a cold ferment.
Day 2 – Morning (8:00–9:00 AM)
Preheat the oven with a Dutch oven inside to 270°C (520°F).
Bake
Lower the oven temperature to 240°C (465°F). Transfer the dough to the hot Dutch oven, cover, and bake for 25 minutes. Remove the lid, lower the temperature to 200°C (390°F), and bake uncovered for another 25 minutes.
Cool
Remove the bread from the pot and let it cool completely before slicing.
💭Crucial Success Tips
The single most important factor for success with this bread is fermentation, not kneading. Fresh milled flour ferments differently than store-bought flour, so watch the dough instead of the clock. You’re looking for visible rise, a lighter feel, and gentle elasticity. If your kitchen is cool, fermentation may take longer. If it’s warm, things will move faster. Trust your starter and give the dough time to develop.
Recipe FAQs
Fresh milled flour absorbs water more slowly than commercial flour. The dough often feels dry right after mixing, but it softens significantly as it rests and during stretch and folds.
A Dutch oven gives the best oven spring and crust, but you can bake on a stone or steel with steam added to the oven. Results may vary slightly.
This loaf has a mild, balanced sour flavor. Longer cold fermentation will increase it, while a shorter rise keeps it more neutral.
This specific recipe is designed for longer fermentation, but if you need a faster option, the same-day fresh milled sourdough linked at the top is a better fit.
How To Store Basic Fresh Milled Sourdough Bread
To keep your sourdough fresh, store it at room temperature in a paper bag or loosely wrapped in a kitchen towel for up to 2 days. For longer storage, place it in a plastic bag or airtight container in the fridge for up to a week, though the crust may soften slightly. If you want to keep it even longer, slice the bread and freeze it in a freezer-safe bag for up to 3 months. You can toast or warm slices directly from the freezer when ready to eat.
Other Delicious Recipes
- 100% Fresh Milled Sourdough in a Loaf Pan (The Two-Pan Method)
- Fresh Milled Banana Muffins with Applesauce

- How to Make a Sourdough Starter With Fresh Milled Flour - From Scratch!
- Fresh-Milled Cinnamon Toast Crunch Cereal

If you tried this basic fresh milled sourdough bread or any other recipe on my blog please leave a 🌟 star rating and let me know how it went in the 📝 comments below! Happy Baking!
Basic Fresh Milled Sourdough Bread Recipe
Ingredients
- 500 g fresh milled hard white wheat flour
- 350 g water warm
- 150 g active sourdough starter fresh milled or all purpose
- 10 g salt
Method
- In a large bowl, mix the flour and water until no dry spots remain (about 3 minutes). I find it easiest to “squeeze” the dough between my fingers a few times. The dough will feel fairly dry at this stage. Cover and let rest for 30 minutes.
- Add the sourdough starter and salt. Knead until fully incorporated into the dough (about 3 minutes).
- Over the next 2 hours, perform about 3 sets of stretch and folds, spaced roughly 30 minutes apart.
- After the final set, let the dough continue fermenting at room temperature until it looks noticeably puffed and taller. Total room-temperature fermentation time is about 4–6 hours, depending on your kitchen and starter strength. Start counting the bulk fermentation from the moment you add the starter to the dough.
- Shape the dough into a rough rectangle (it’s okay if it’s uneven), roll it up, turn it sideways, and roll it up again. Then shape it into a boule or batard (oval or ball shape, depending on your proofing basket). Place it seam-side up in a floured proofing basket and pinch the seam to seal.Second rise (choose one):- Room temperature: let rise 2–3 hours until slightly expanded.- Refrigerator: cover and cold-ferment 8–24 hours.
- Preheat the oven with a Dutch oven inside to 270°C (520°F). Lower the temperature to 240°C (465°F), transfer the dough into the hot pot, cover, and bake for 25 minutes.
- Remove the lid, lower the temperature to 200°C (390°F), and bake uncovered for another 25 minutes.
- Remove from the oven and let cool completely before slicing.
Notes
- Don’t stress too much about the timing of stretch and folds. Three sets can be done anytime during the first 2 hours of the first rise, as long as they’re at least 15 minutes apart so the dough can relax.
- Be gentle during stretch and folds. Avoid tearing the dough, even if that means you don’t stretch it very far.
Private Notes
Tried this recipe?
Please leave a rating!Need Help Tweaking This Recipe?
Other X Recipes You'll Love


Heather Johnson says
I plan to make this recipe tomorrow. I noticed fresh milled flour doesn't absorb water as much as store bought. does it just need a moment to soak the liquid up. I used an old 1946 recipe that measures by cups not grams. I love that recipe and had no issues with it before with store bought flour. Just wondering about this new animal called fresh milled wheat and how it behaves.
Tina says
Hi Heather!
Yes, my observations are similar: fresh milled flour needs a lot more time to absorb the flour. So the dough reminds me of wet sand when I first mix it together, as unappetizing as that sounds. But after just 30-60 mins (I usually try to do just a little more than 0 mins), it's much easier to handle, so that's why I only start stretch and folds after at least 30 minutes of mixing.
I was actually in a dilemma whether to post recipes in cups or grams, but for fresh milled flour especially, I'm a big fan of grams. And that's because the amount of flour in volume (so in cups) depends so much on what kind of berries you're using (even if they are the same variety, they can mill a bit different), which mill are you using (some mills mill finer, some coarser), how much moisture the berries contain etc. But in grams, it's straightforward! So for baking with fresh milled flour, I highly recommend grams.
But other than than: expect the dough to be a bit more "grainy" than with store bought flour, and it definitely won't stretch that well. It will also rise less (about 30-50% is enough for fresh milled flour, otherwise you're risking overfermentation), and use more flour for shaping, it tends to be stickier. The dough will also appear more dense in the beginning, but don't add more water to it, because it will become impossible to handle if you do.
I think that's all, but please let me know how it went and I'll help to troubleshoot if you have any problems!