
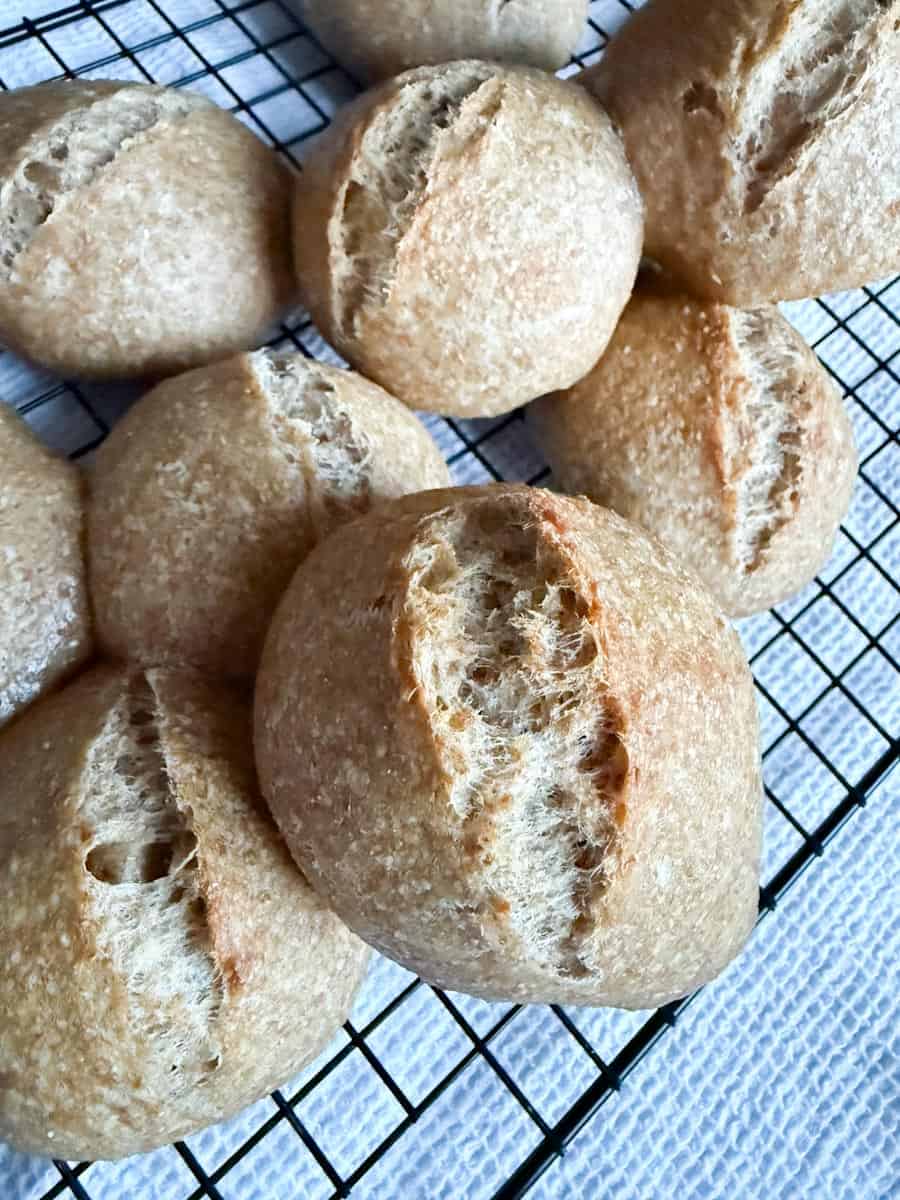
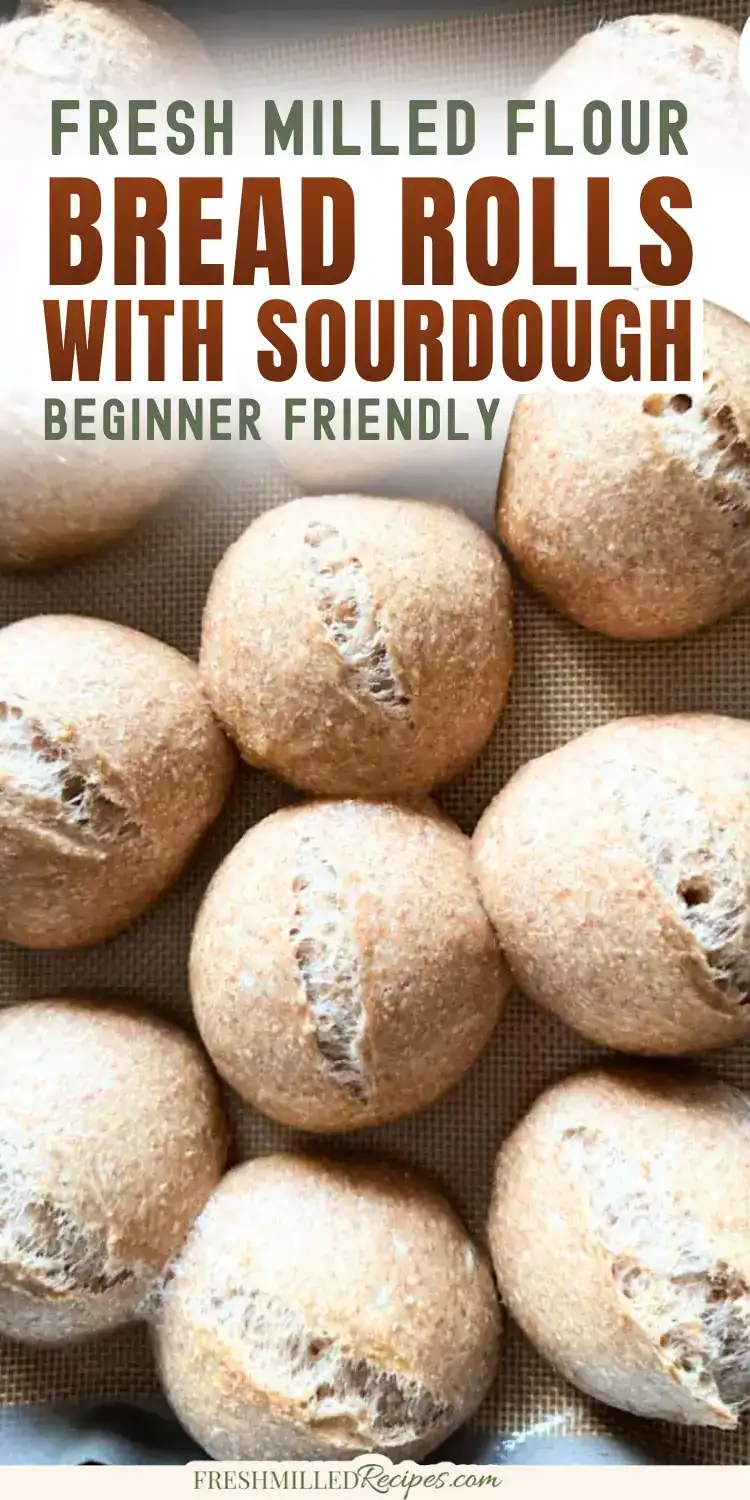
These fresh-milled sourdough bread rolls are everything I love about whole grain baking soft, deeply flavorful, and tender thanks to sourdough fermentation golden. They’re simple enough to be beginner friendly yet special enough for the holidays. If you need something not as rich as dinner rolls, but still delicious, these are it!
These rolls show up on my table all year long, but they really shine on special days, so birthdays, Christmas, and anytime I’m serving a big pot of soup or stew.
If you have some spelt berries and want to try that in bread rolls, you can give my fresh milled slept rolls a try.
If you want to serve something a bit richer with your meals, check out my soft sourdough dinner rolls with fresh-milled flour, or even sourdough pizza rolls with fresh milled flour!
Summarize & Save This Recipe On:
Quick Look
- Prep time: 45 mins.
- Bake time: 35 mins.
- Rise time: 8 hrs.
- Servings: 10 rolls.
- Main ingredients: fresh milled hard white wheat, water, sourdough starter, salt
- Cooking method: Baking 🡢 Oven
- Difficulty: Medium
- Serving ideas: Breakfast, sandwiches, dinner rolls
Jump to:
- Summarize & Save This Recipe On:
- Quick Look
- Important Ingredients
- Substitutions & Variations
- How to Make Fresh-Milled Sourdough Bread Rolls
- Baking Schedule
- 💭Crucial Success Tips
- Recipe FAQs
- How To Store Fresh-Milled Sourdough Bread Rolls
- Other Delicious Recipes
- Fresh-Milled Sourdough Bread Rolls
- Need Help Tweaking This Recipe?
- Other Fresh-Milled Sourdough Recipes You'll Love
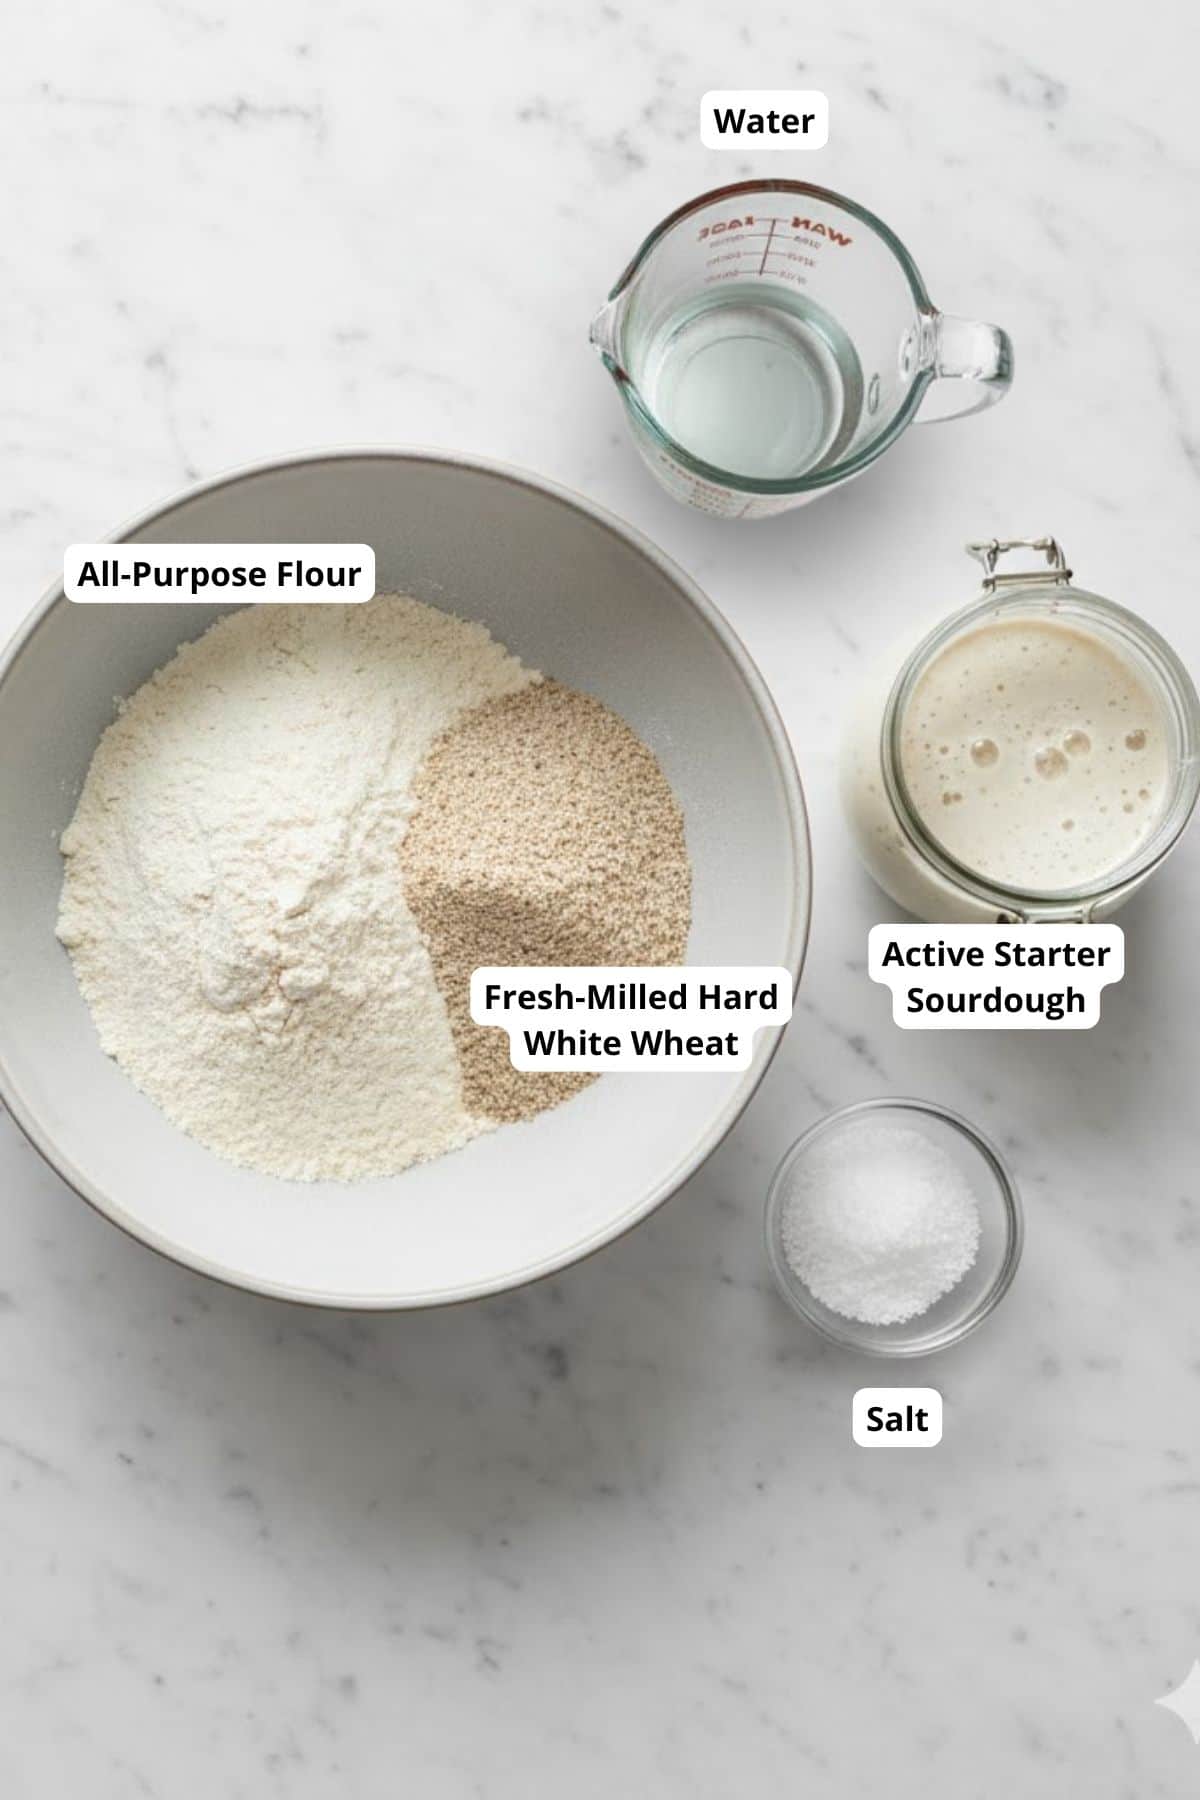
Important Ingredients
- Fresh milled flour: Milling the flour right before baking gives these rolls their signature aroma, soft inside, and rich whole grain flavor.
- Sourdough starter: Provides rise, and a gentle tang. Active, bubbly starter makes all the difference if you want these to be not as tangy
- Water: Hydrates the fresh milled flour, which absorbs more water than store-bought flour. Gives the rolls enough hydration to be soft.
See recipe card for quantities.
Substitutions & Variations
- Herb rolls: Add rosemary, thyme, sage, or a blend to the dough, or brush with herb infused butter after baking.
- Seed-topped rolls: Brush with egg wash and sprinkle sesame, poppy, or sunflower seeds before baking for crunch and extra flavor.
How to Make Fresh-Milled Sourdough Bread Rolls
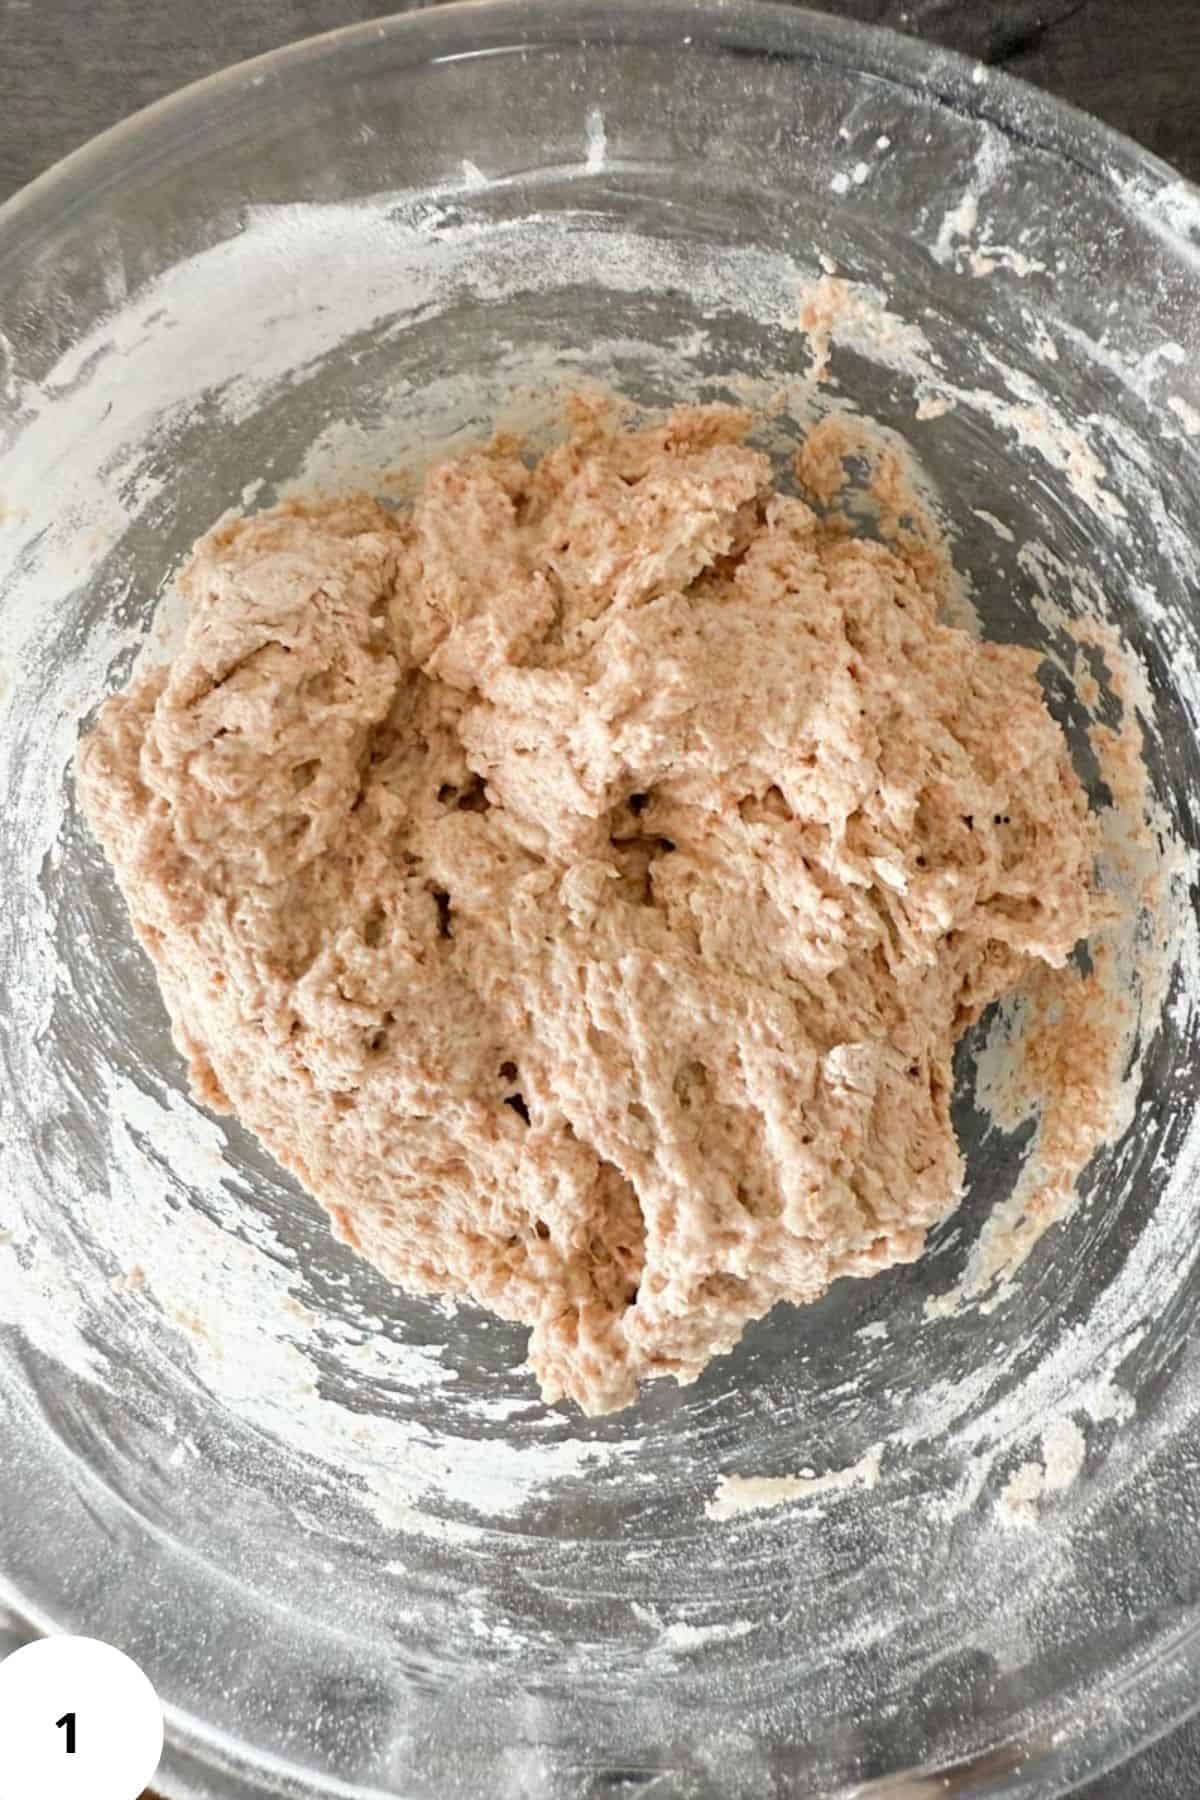
Step 1: In a large bowl, whisk together the water, starter, and salt. Add both flours and mix with a spoon or wet hands until no dry bits remain. The dough should be soft and loose but not runny (Image 1).

Step 2: Cover the bowl (Image 2). Let the dough rest for 30–60 minutes. If it still feels tight, gently add 5–15 g more water.
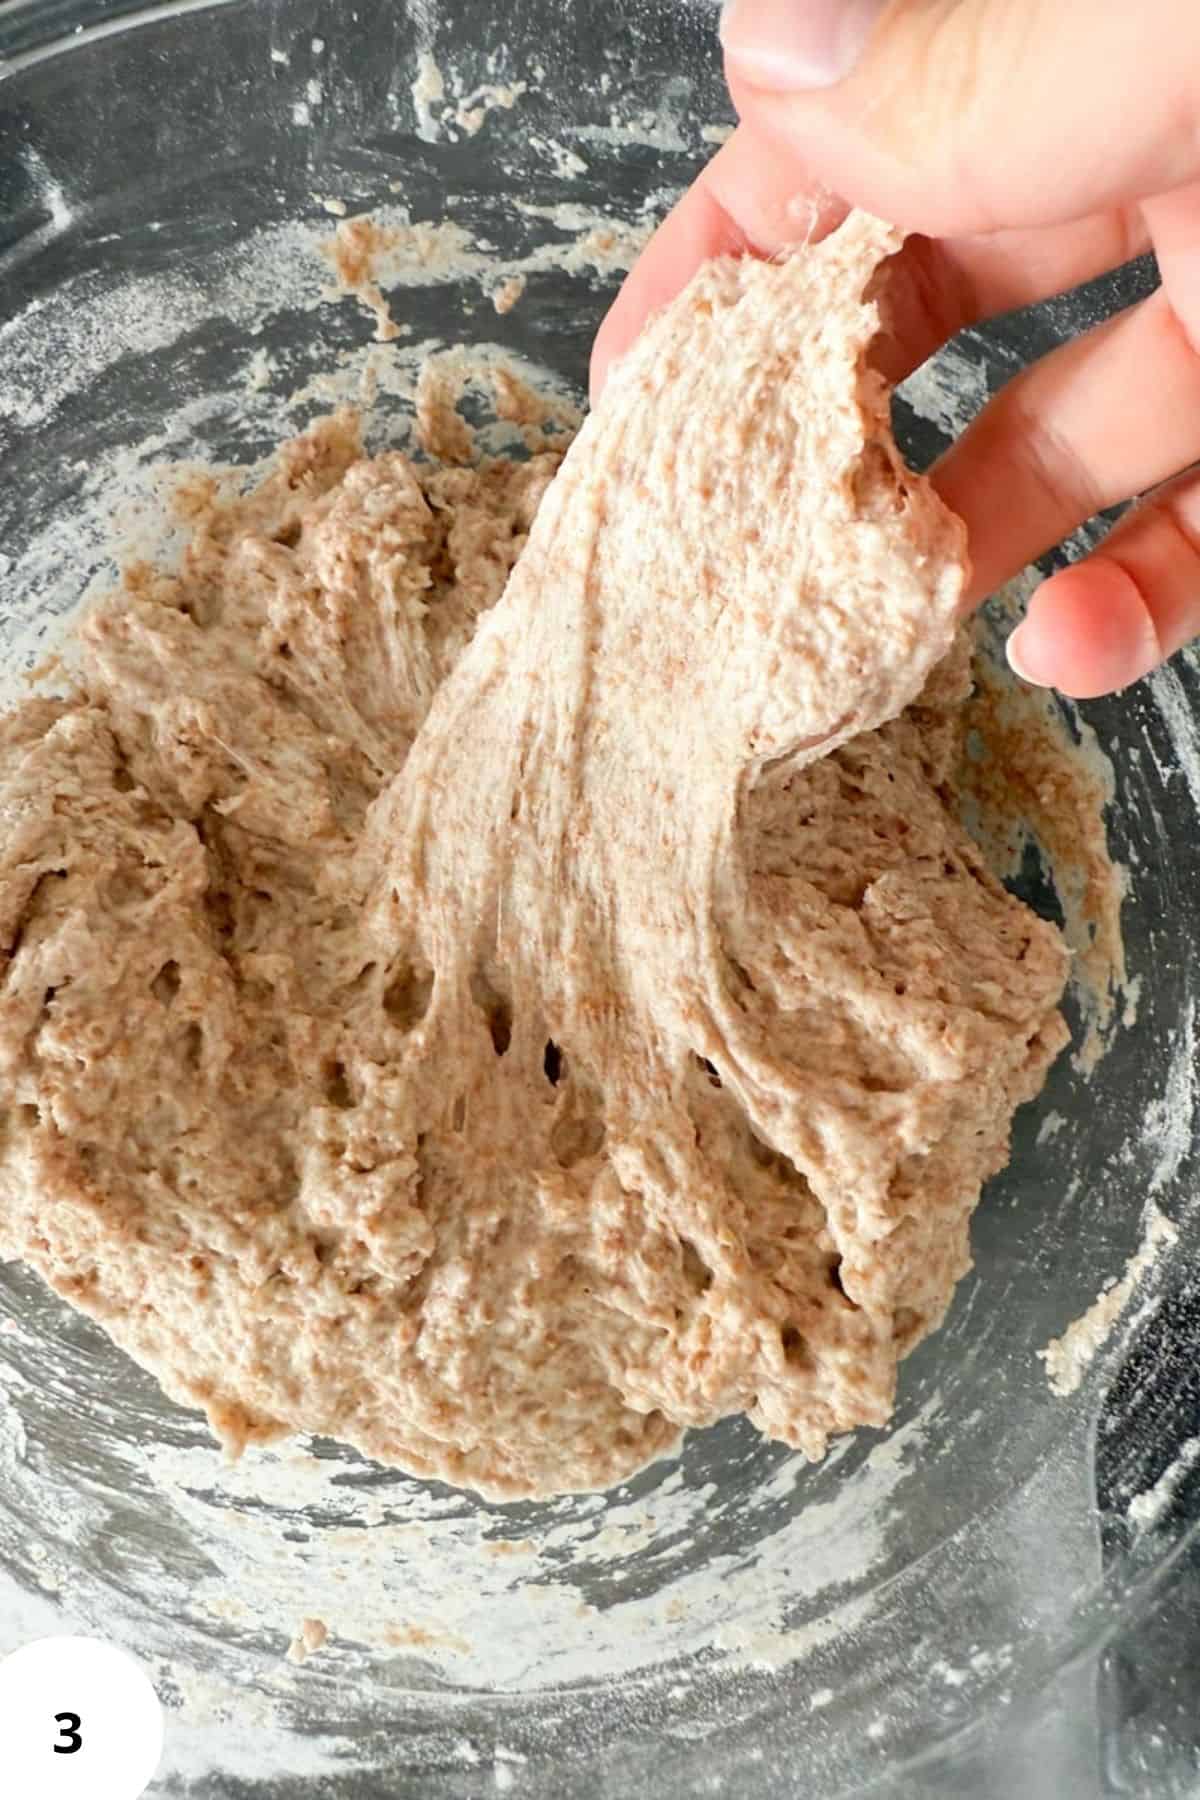
Step 3: The dough should be slightly sticky but hold together when lifted (Image 3).
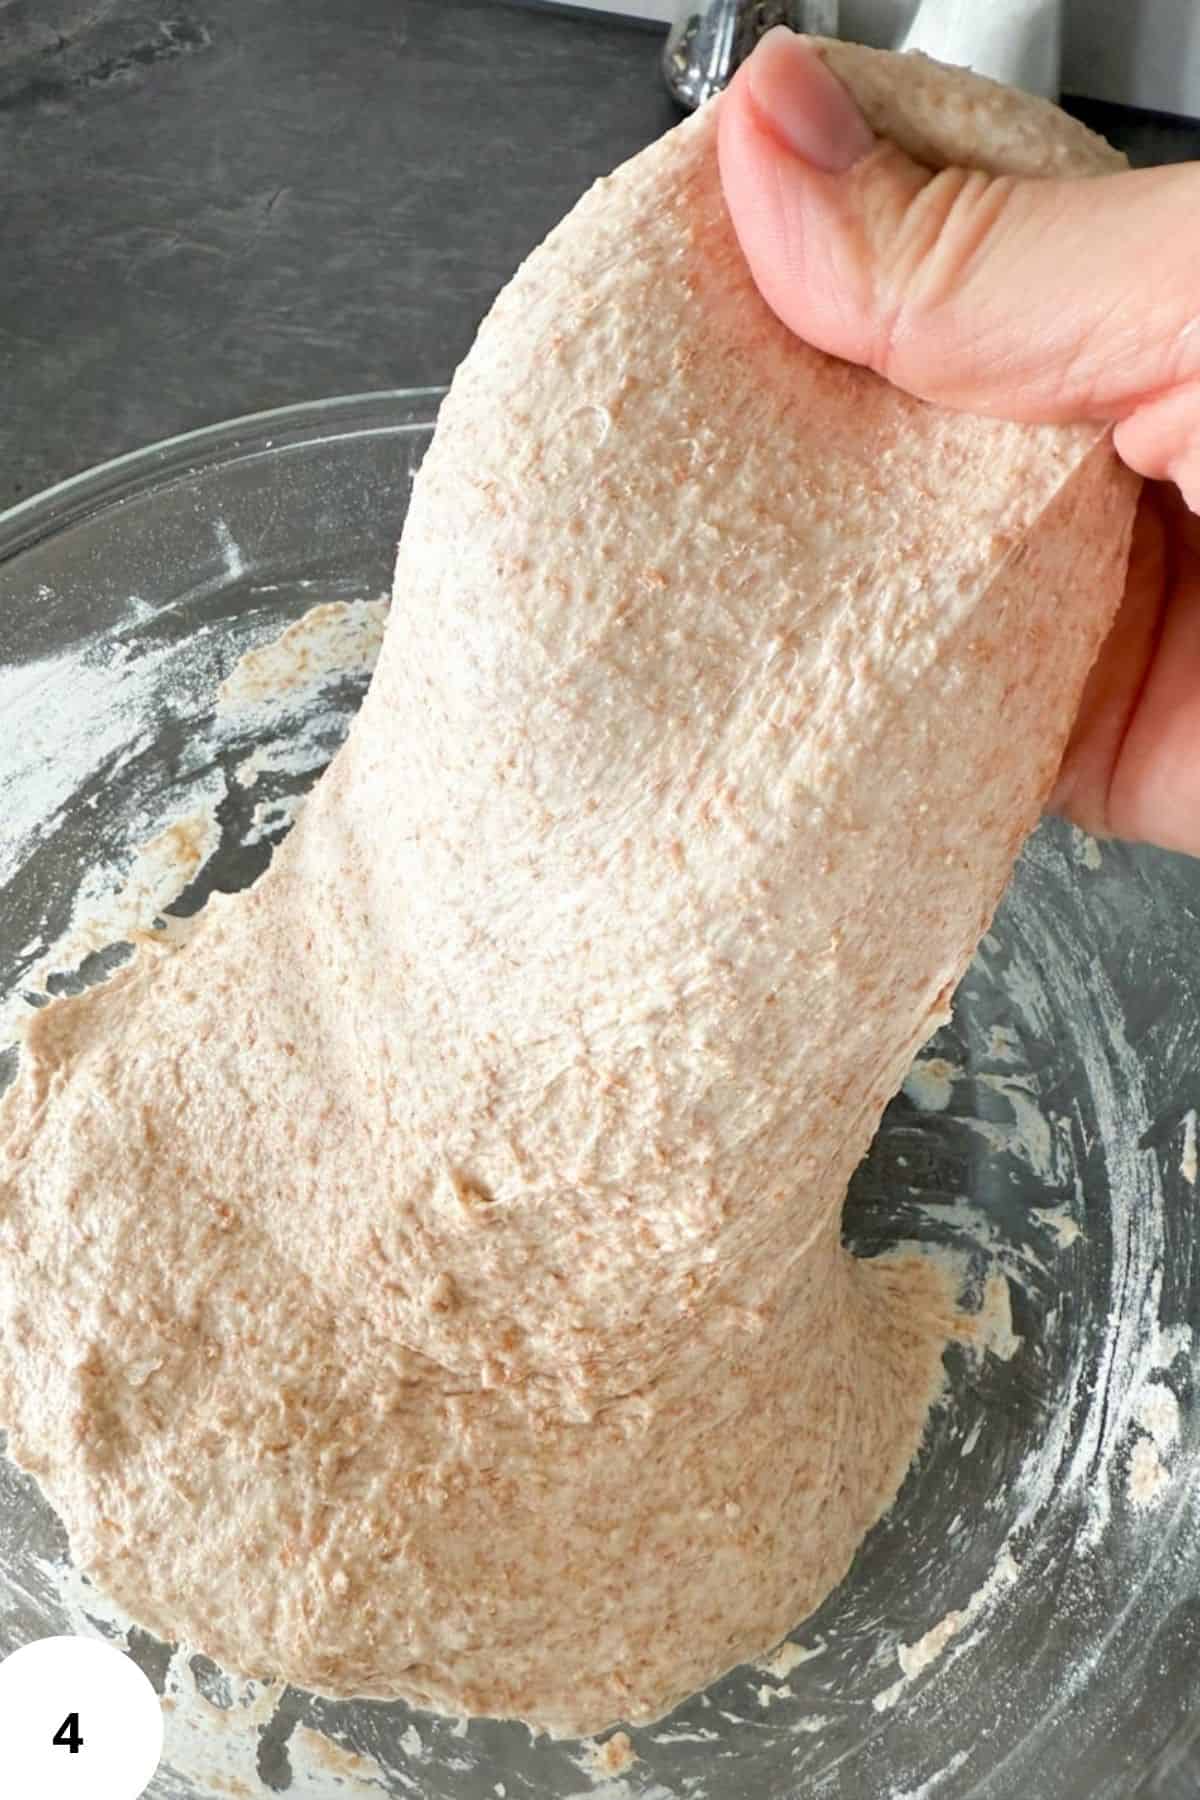
Step 4: Perform 3 sets of stretch-and-folds every 20 minutes. Lift the dough 4–6 times per set, stopping when you feel some resistance (Image 4). Keep the bowl covered between sets (Image 2).
Ferment at 23–25°C (73–77°F) until the dough rises 30–50% and small bubbles form around the edges. This usually takes 5–7 hours; cooler rooms may take up to 10 hours.
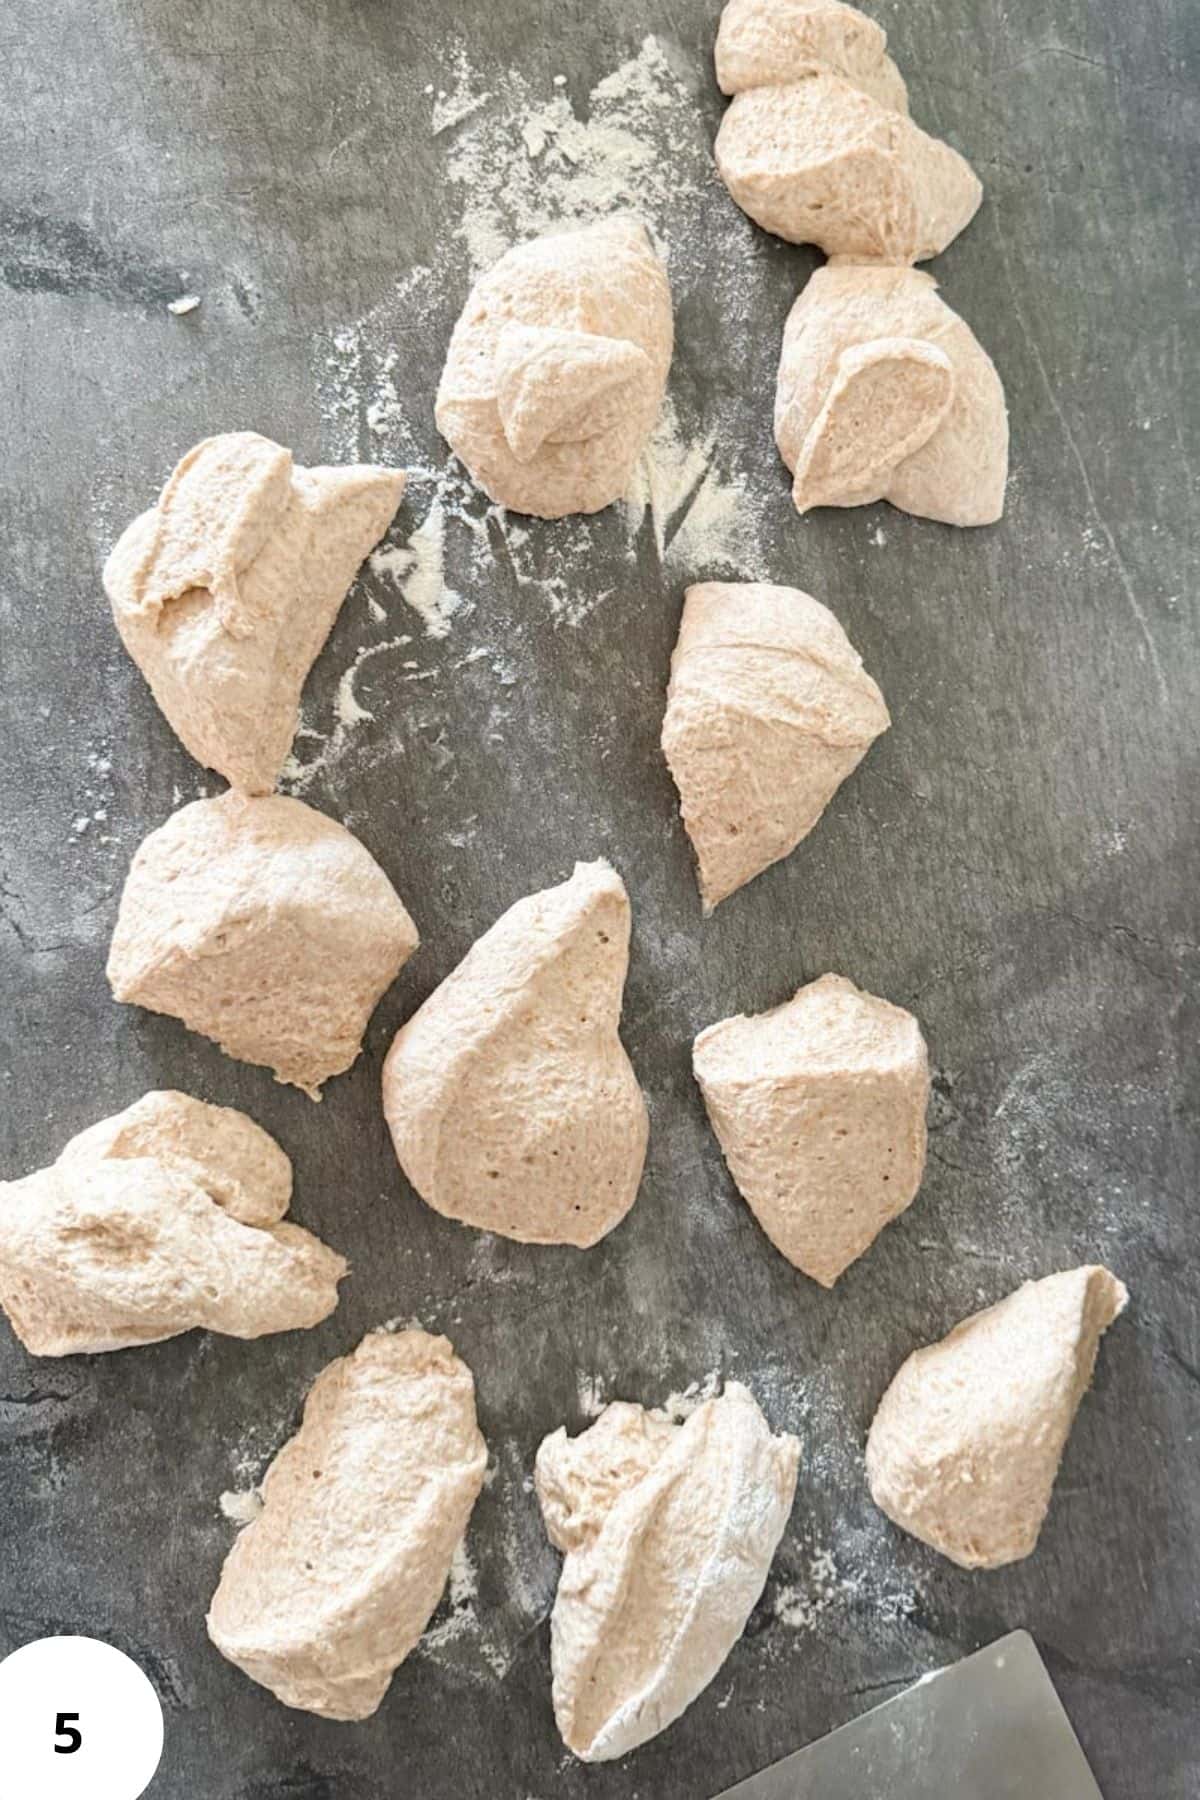
Step 5: Lightly flour your counter. Tip out the dough, dust the top with flour, and cut into 8–10 equal pieces (Image 5).

Step 6: Gently round each piece into a loose ball (Image 6). Let rest uncovered for 10–15 minutes to allow a thin skin to form. Tighten each piece into a taut ball by cupping it in your hands and dragging it slightly on the counter. You can also shape them into mini batards.

Step 7: Place the rolls seam-side down on a parchment-lined sheet pan, leaving space between them (Image 7).

Step 8: Proof at room temperature for 45–75 minutes, until slightly puffy. Preheat the oven to 220°C / 425°F with an empty metal pan on a lower rack. Lightly dust with flour if you like, and make a shallow slash or snip on each roll (Image 8).

Step 9: Bake (Image 9):
- Conventional oven (no fan): Place the rolls in the oven, add 1 cup of hot water or ice to the lower pan for steam, and close the door. Bake 15–18 minutes. Remove the steam pan, reduce the temperature to 200°C / 400°F, and bake another 12–15 minutes until deep golden and crisp.
- Convection / fan oven: Preheat to 200°C / 400°F with an empty metal pan on the lower rack. Add 1 cup of hot water or ice to the pan for steam, close the door, and bake about 20 minutes. Remove the steam pan and bake another 10–15 minutes until deep golden and crisp.
- The internal temperature should reach 96–99°C / 205–210°F.

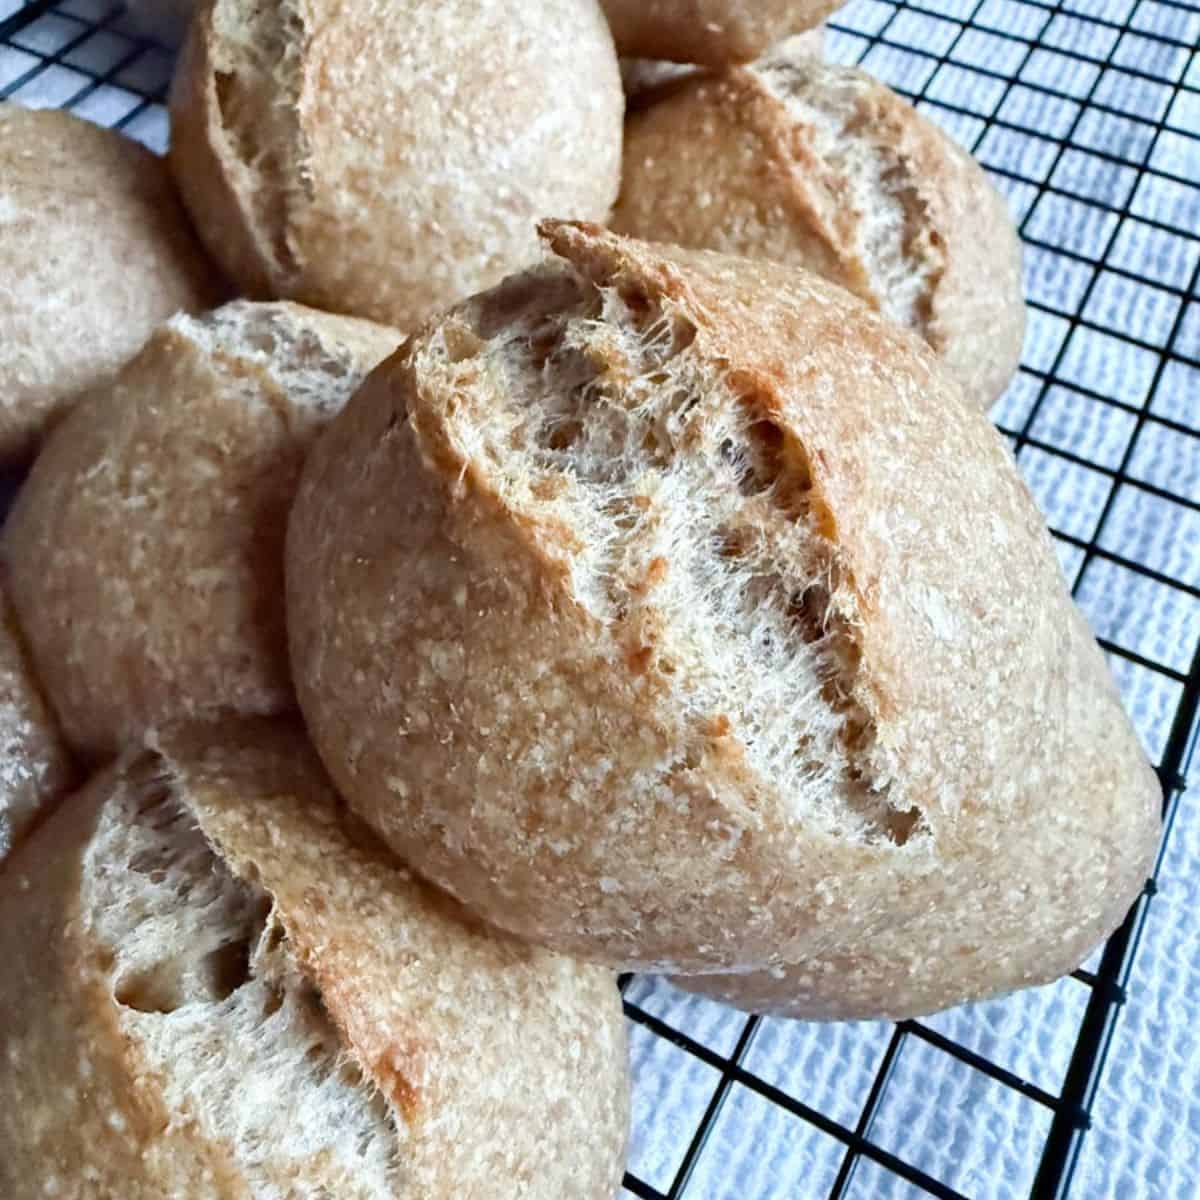
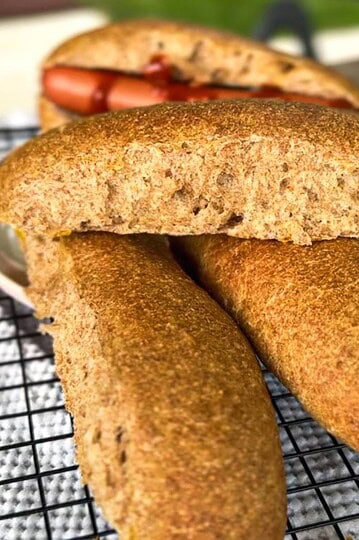
Step 10: Transfer the rolls to a wire rack (Image 10) so the crust sets and air can circulate. Serve warm or at room temperature.
Hint: don't be afraid to use some flour when shaping. It's better to go a little overboard than to have a sticky mess.
Baking Schedule
8:00 AM — Mix the Dough
8:30 AM — Rest (Hydration Phase)
8:30–9:30 AM — Stretch and Folds
9:30 AM–4:00 PM — Bulk Fermentation
4:00 PM — Pre-Shape the Dough
4:20 PM — Shape the Loaf
4:20–6:00 PM — Final Proof
💭Crucial Success Tips
- Let the dough ferment fully, but don't wait fo get a huge rise. Fresh milled flour takes a little shorter to ferment and the rise won't be drastic, so look for about 40-60% rise rather than doubling.
- Don’t skip the rest after dividing the dough, it makes shaping smoother and results in taller, rounder rolls.
- Steam makes the crust flexible for better oven spring and a softer inside.
Recipe FAQs
Freshly milled flour contains all the natural oils, bran, and germ. This gives the rolls better flavor, more nutrition, and a better texture.
Yes! Shape the rolls, refrigerate overnight, and bake the next day. The chilled proof adds even more flavor, but it also makes them a little more tangy.
Freshly milled flour absorbs more water. If the dough feels stiff after the initial mix, add a little more water during the rest phase.
You can, but the flavor and hydration will be different. Start with less water and adjust as needed.
How To Store Fresh-Milled Sourdough Bread Rolls
Store rolls in an airtight container at room temperature for 2–3 days. Freeze for up to 1 month; thaw at room temperature before serving.
Other Delicious Recipes
- Fresh-Milled Cinnamon Roll Pull-Apart Sourdough Focaccia

- Fresh-Milled Double Chocolate Zucchini Muffins

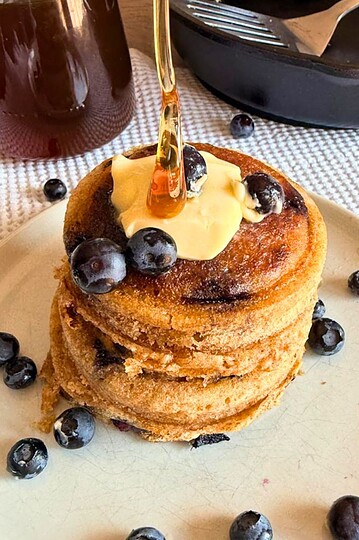
- Fresh-Milled Sourdough Pancakes

- Fresh-Milled Sourdough Mini Pancakes (Jar Ring Pancakes)

If you tried these Fresh-Milled Sourdough Bread Rolls or any other recipe on my blog please leave a 🌟 star rating and let me know how it went in the 📝 comments below! Happy Baking!
Fresh-Milled Sourdough Bread Rolls
Ingredients
- 280 g fresh-milled hard white wheat
- 120 g all-purpose flour
- 325 g water start at 300 g; add after the rest if needed
- 85 g active sourdough starter 100% hydration
- 8 g fine sea salt
Instructions
- In a large bowl, whisk together the water, starter, and salt. Add both flours and mix with a spoon or wet hands until no dry bits remain. The dough should be soft and loose but not runny.
- Cover the bowl. Let the dough rest for 30–60 minutes. If it still feels tight, gently add 5–15 g more water.
- The dough should be slightly sticky but hold together when lifted.
- Perform 3 sets of stretch-and-folds every 20 minutes. Lift the dough 4–6 times per set, stopping when you feel some resistance. Keep the bowl covered between sets.Ferment at 23–25°C (73–77°F) until the dough rises 30–50% and small bubbles form around the edges. This usually takes 5–7 hours; cooler rooms may take up to 10 hours.
- Lightly flour your counter. Tip out the dough, dust the top with flour, and cut into 8–10 equal pieces.
- Gently round each piece into a loose ball. Let rest uncovered for 10–15 minutes to allow a thin skin to form. Tighten each piece into a taut ball by cupping it in your hands and dragging it slightly on the counter. You can also shape them into mini batards.
- Place the rolls seam-side down on a parchment-lined sheet pan, leaving space between them.
- Proof at room temperature for 45–75 minutes, until slightly puffy. Preheat the oven to 220°C / 425°F with an empty metal pan on a lower rack. Lightly dust with flour if you like, and make a shallow slash or snip on each roll.
- Bake:Conventional oven (no fan): Place the rolls in the oven, add 1 cup of hot water or ice to the lower pan for steam, and close the door. Bake 15–18 minutes. Remove the steam pan, reduce the temperature to 200°C / 400°F, and bake another 12–15 minutes until deep golden and crisp.Convection / fan oven: Preheat to 200°C / 400°F with an empty metal pan on the lower rack. Add 1 cup of hot water or ice to the pan for steam, close the door, and bake about 20 minutes. Remove the steam pan and bake another 10–15 minutes until deep golden and crisp.The internal temperature should reach 96–99°C / 205–210°F.
- Transfer the rolls to a wire rack so the crust sets and air can circulate. Serve warm or at room temperature.
Video
Notes
- Browning: If the rolls are browning too fast, lower the oven by 10–15°C (25°F) during the second half of baking, or take them out 2–3 minutes earlier.
- Steam pan: Always use a metal pan for steam, not glass, to avoid cracking from temperature changes.
- Hydration: All-purpose flour absorbs less water than whole grain flour. Start with 300 g water and add more only if the dough feels tight.
- Steam shortcut: No sprayer? Wet your fingers lightly and pat the shaped rolls so the surface is slightly damp before baking.
- Cold proof: You can refrigerate shaped rolls for 2–24 hours. Bake straight from the fridge, adding 4–6 minutes to the baking time. This gives a slightly tangier flavor.
- Fermentation: Whole grain dough can ferment faster, watch the dough, not the clock.
Private Notes
Tried this recipe?
Please leave a rating!Need Help Tweaking This Recipe?
Other Fresh-Milled Sourdough Recipes You'll Love


Leave a Reply